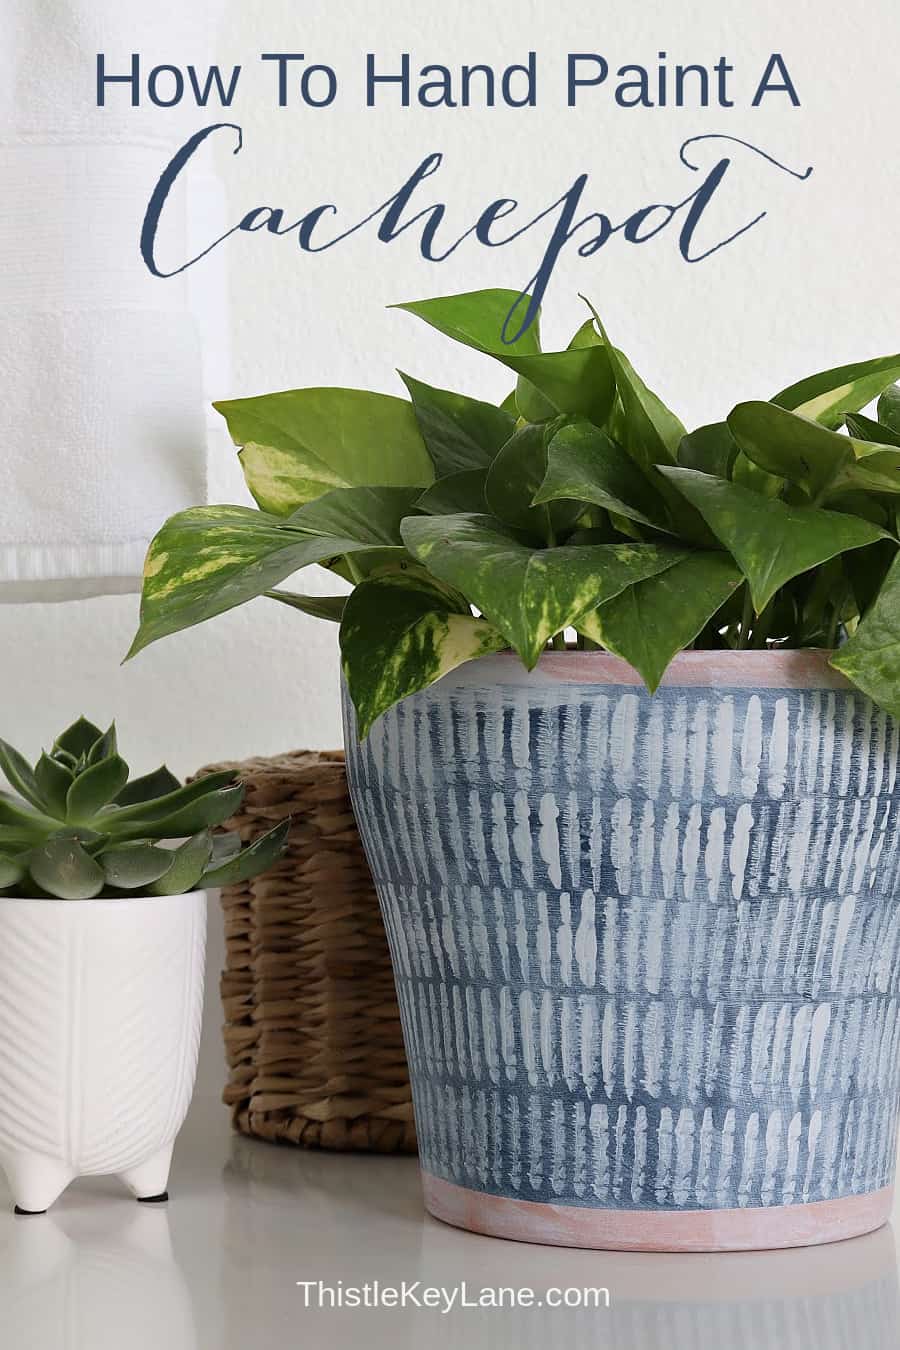
Today I’m sharing how to hand paint a cachepot. After searching for decorative plant holders, I found lots of pretty ones but most of what I really liked are not in my current budget. So as you can guess, I got busy figuring out how to make my own.
As an Amazon affiliate, I earn from qualifying purchases at no cost to you. My blog may contain other affiliate links as well for your convenience. For more information please see my disclosure page.
How To Hand Paint A Cachepot
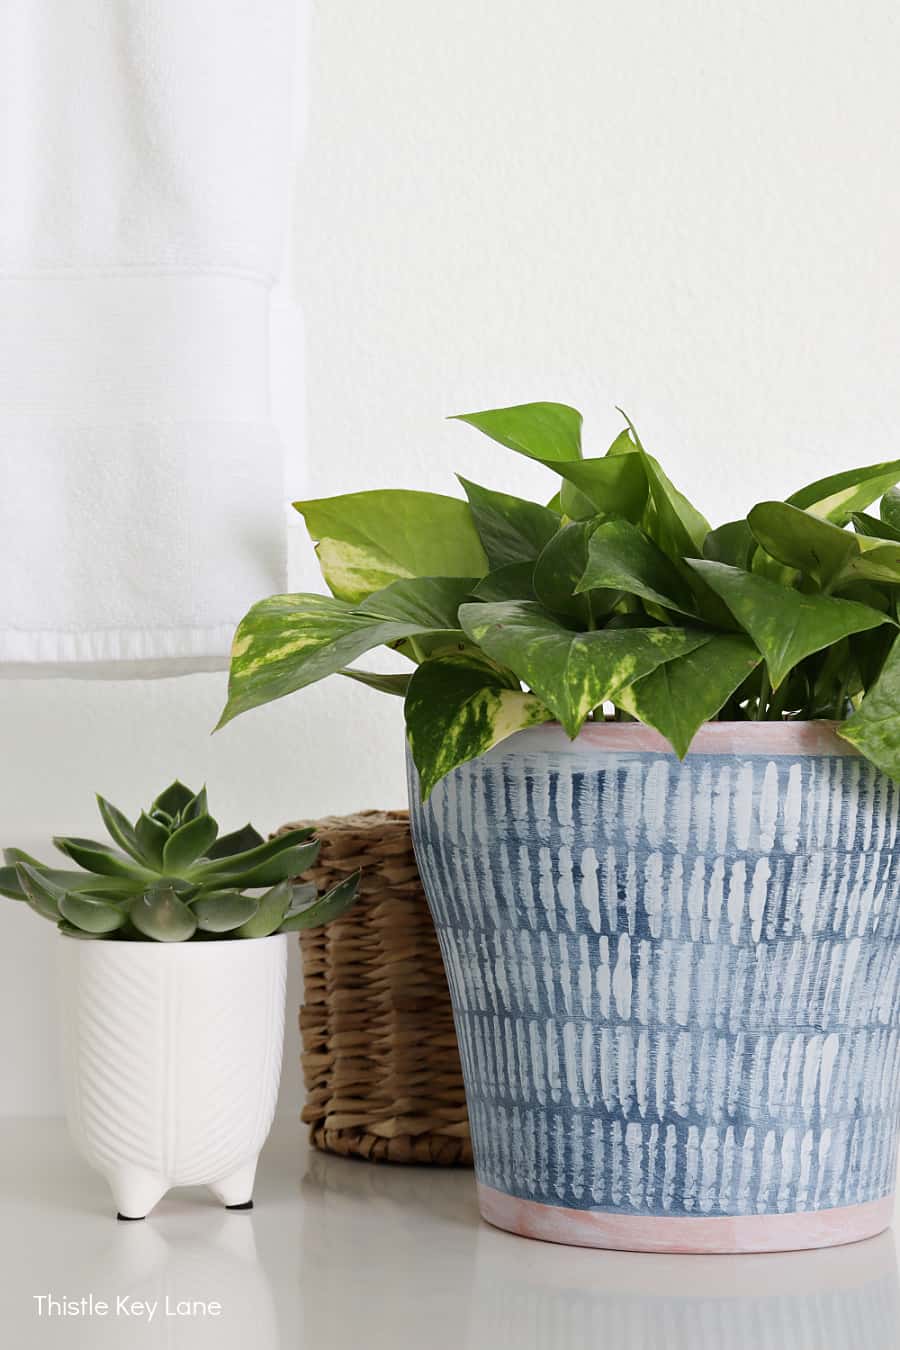
Having room for plants on the bathroom counter was one of the things I looked forward to having with our bathroom update. I always love bring home new plants and can’t wait to see how well this one will do in here.
Hopefully it will be very happy and grow like crazy with lots of morning light streaming in the large window.
Here’s some trivia for you…the French word cachepot means a decorative container, meant to hide a flower pot. They do not have drain holes like a regular flower pot or plastic plant container.
Supplies
- terracotta or ceramic pot
- painters tape
- craft acrylic paint
- paint brush
- craft brush
- paper towels
- plastic container to mix paint and water
- clay pot sealer (optional)
Step by Step
Before starting, I suggest using a clay pot sealer on the inside of the terracotta pot. Some clay pots are more porous than others allowing moisture to seep through. If that happens the paint on the outside may be affected.
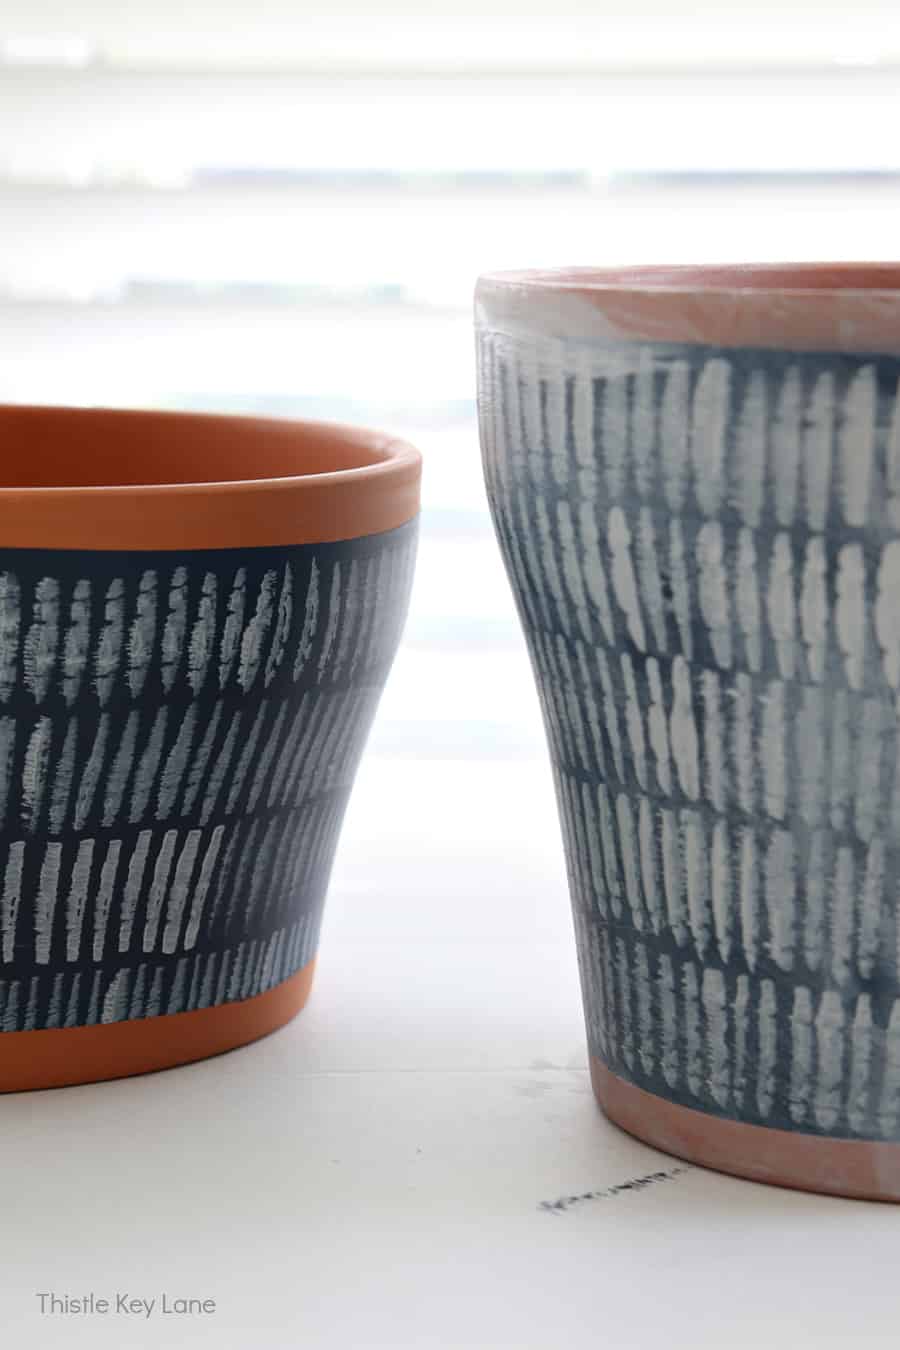
Tape off the top and bottom edges of the terracotta pot. (The pots I have measure 8″x4½” and 6″x7″.)
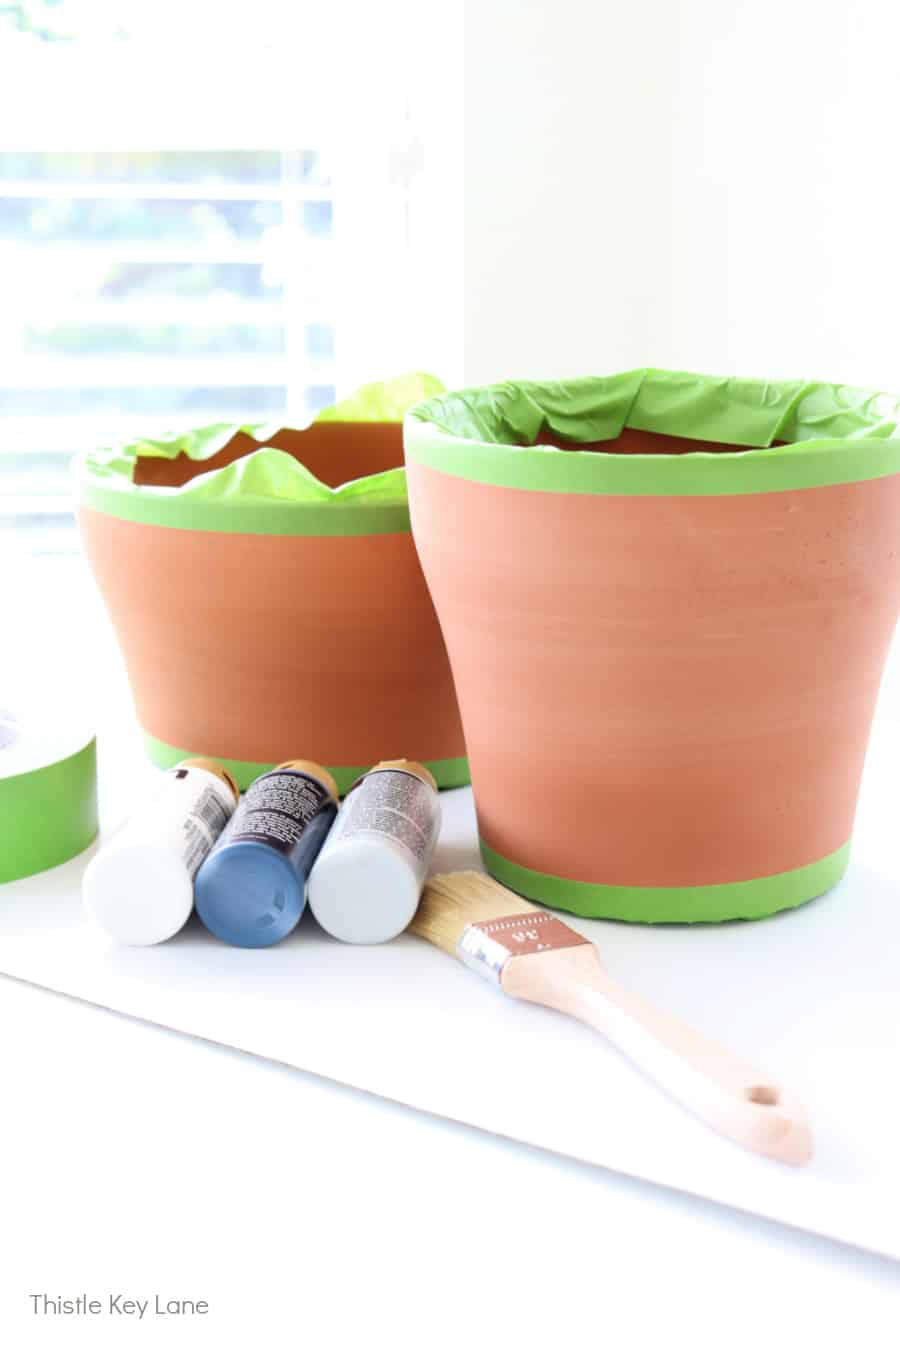
Next paint the outside of the pot with acrylic paint. (I’m using navy blue and pale gray.)

Remove tape from the top of the rim but leave the tape around the bottom. I’ll explain in a moment.
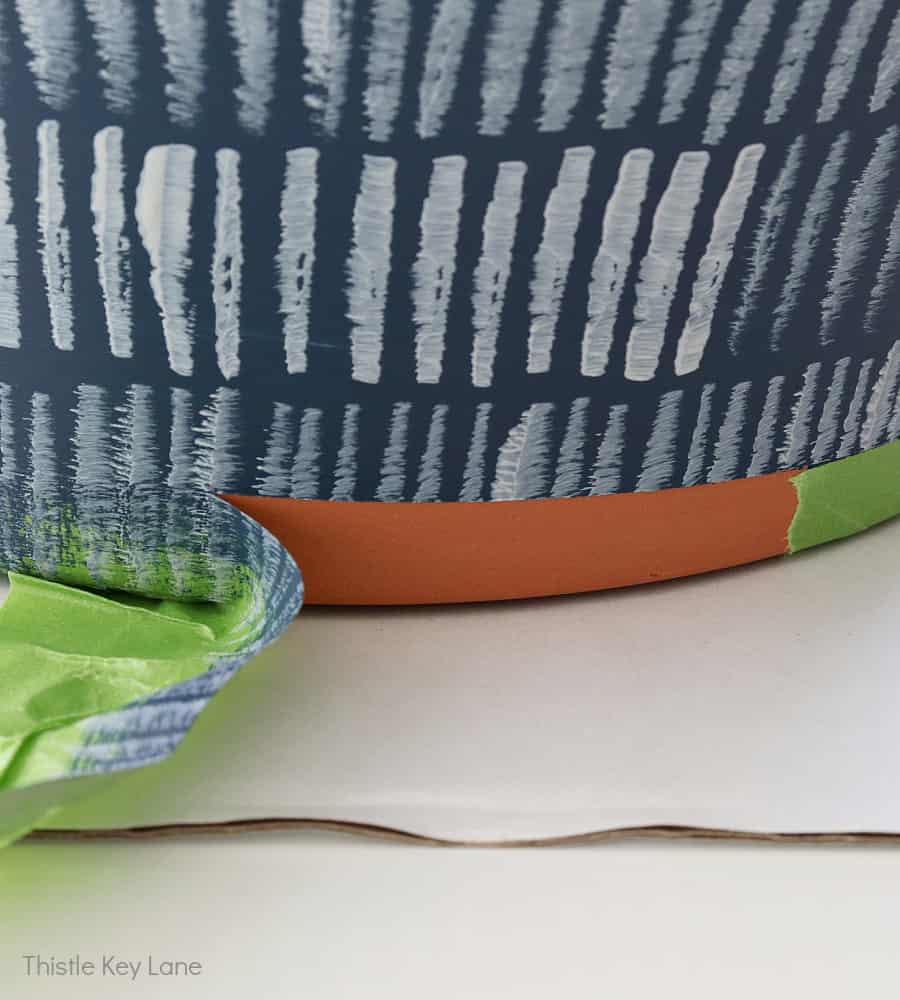
Using a 1″ craft brush create paint marks with the flat edge of the brush using gray paint. I think most of mine are about 1/4 inch wide. Some are a little bigger where I loaded too much paint on my brush.

Once the painting is complete, remove the bottom painters tape. Depending on where your marks end at the bottom, the tape will create a clean edge.
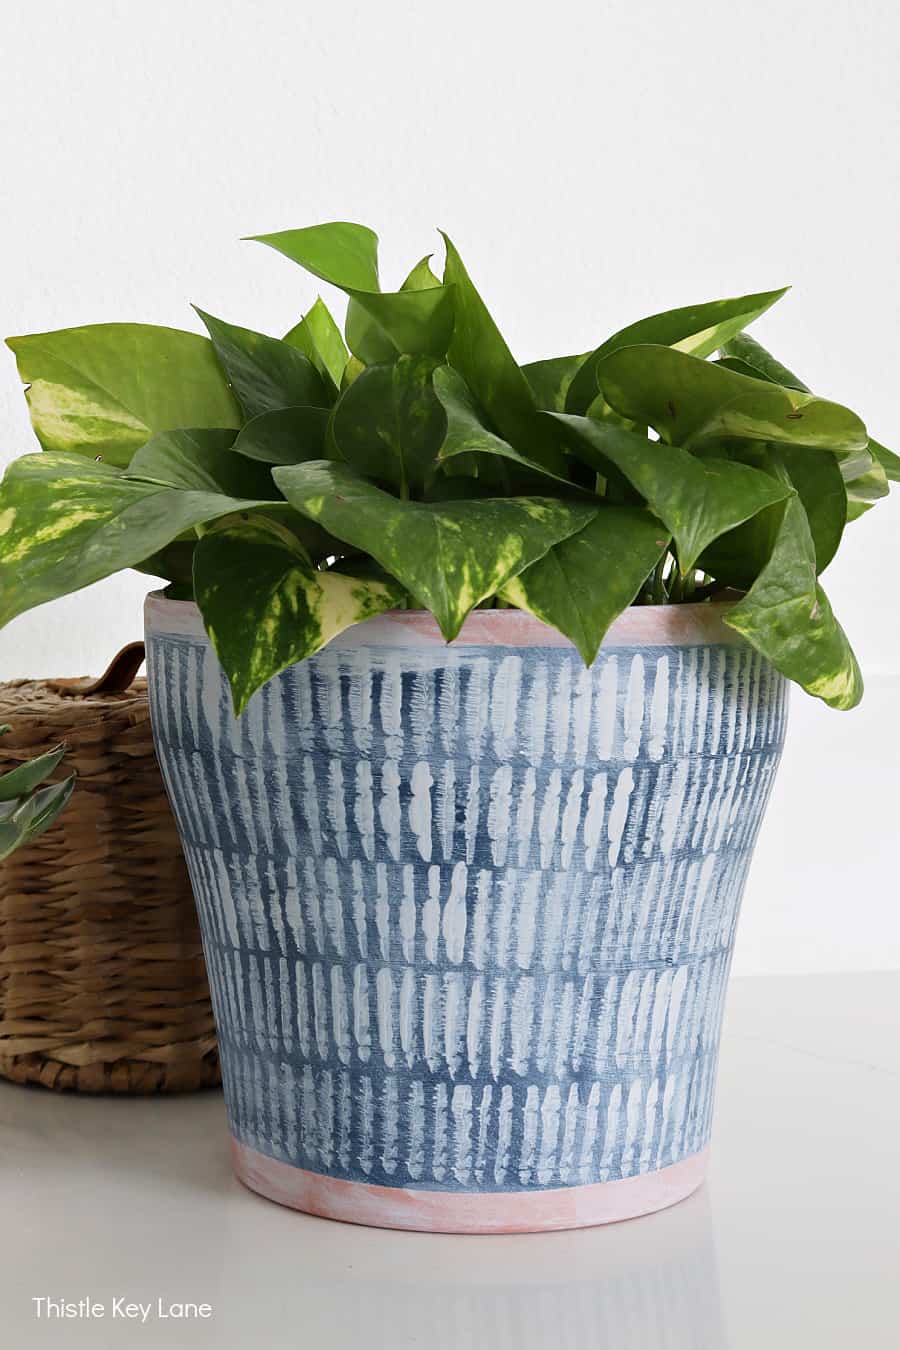
When the paint is dry, cover it in a paint wash. Add about tablespoon of water to about a teaspoon of gray craft paint and mix well in a small plastic container. Test on a piece of cardboard to see if it is thick or thin enough and adjust as needed.
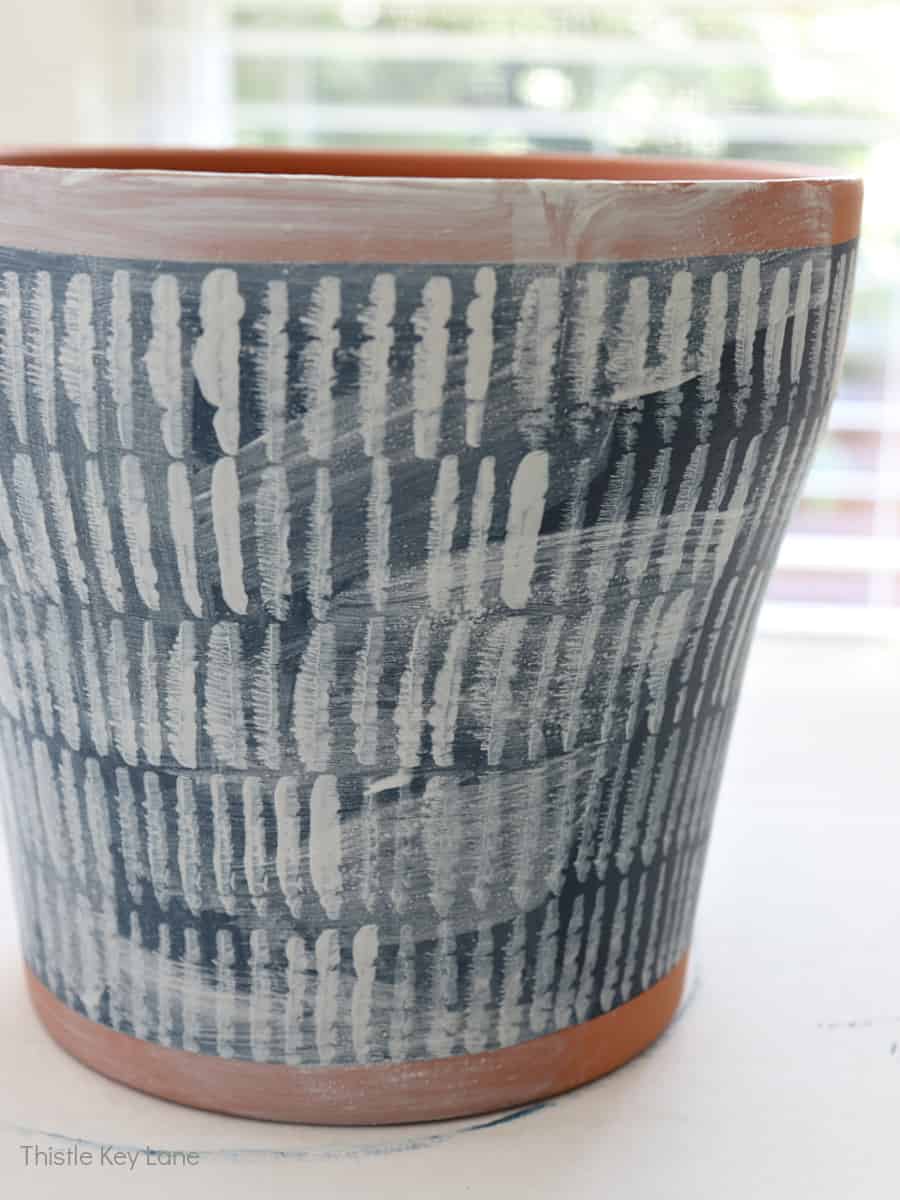
Using the same craft brush, paint the wash over the pot and use a paper towel as needed to dab off any extra.
For a finished look paint the wash on the inside of the rim too.
Originally I planned on using white craft paint for the wash, but I decided at the last minute it would be too bright.
I must say it’s not a perfect process, and one of those projects that you might have to play around with a little bit.
Hand Painting Lines
After trying several different brushes to paint lines I finally decided to use a bigger brush. That way the brush is doing all the work and makes the lines somewhat consistent depending on how I loaded the brush with paint.
I think it’s important to remember that hand painting is not perfect. There are going to be flaws, but that’s alright because it gives the object personality.
I only bought two of the rimless terracotta pots, but I’m ready to paint more to see what other designs I can come up with. Both of the cachepots have a kind of an indigo shibori feel to them. They also look that they have texture even though the paint is smooth. What do you think?
For now I’m using one of the new cachepots on the bathroom counter to hold a new pothos, and may use the other in here as well.
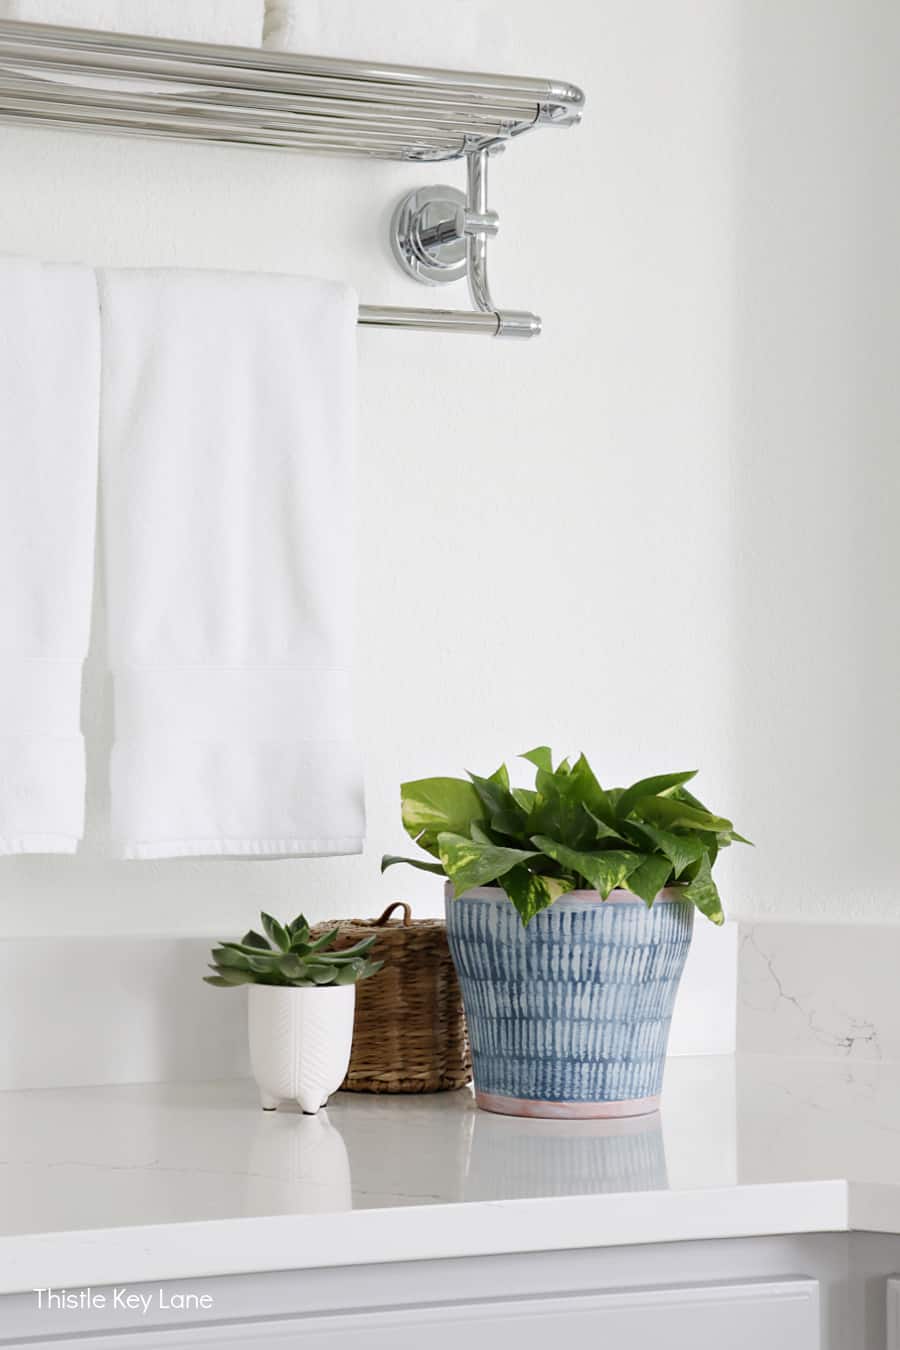
Since they both have the same pattern I can use them as a set or split them up to use in different spaces. Blue and gray will go in just about any room of the house, which is something to think about when picking out paint colors.
Shop Supplies
Click on Ideas For Decorating With Plants on how to change up your displays.
Be sure to follow Thistle Key Lane on Pinterest, where the boards are up to date with my favorite seasonal inspiration!
Thanks for letting me share my little hand painted project with you! Hope you’re having a creative day!
Cheers!
© 2024 How To Hand Paint A Cachepot post first appeared on Thistle Key Lane.


Oh, I’m so glad I found this post. I am so smitten with your cachepot. You’re right, I honestly thought it was textured. Truly brilliant!
Thank you so much Diane! It’s one of those projects that may look hard but it is absolutely not!