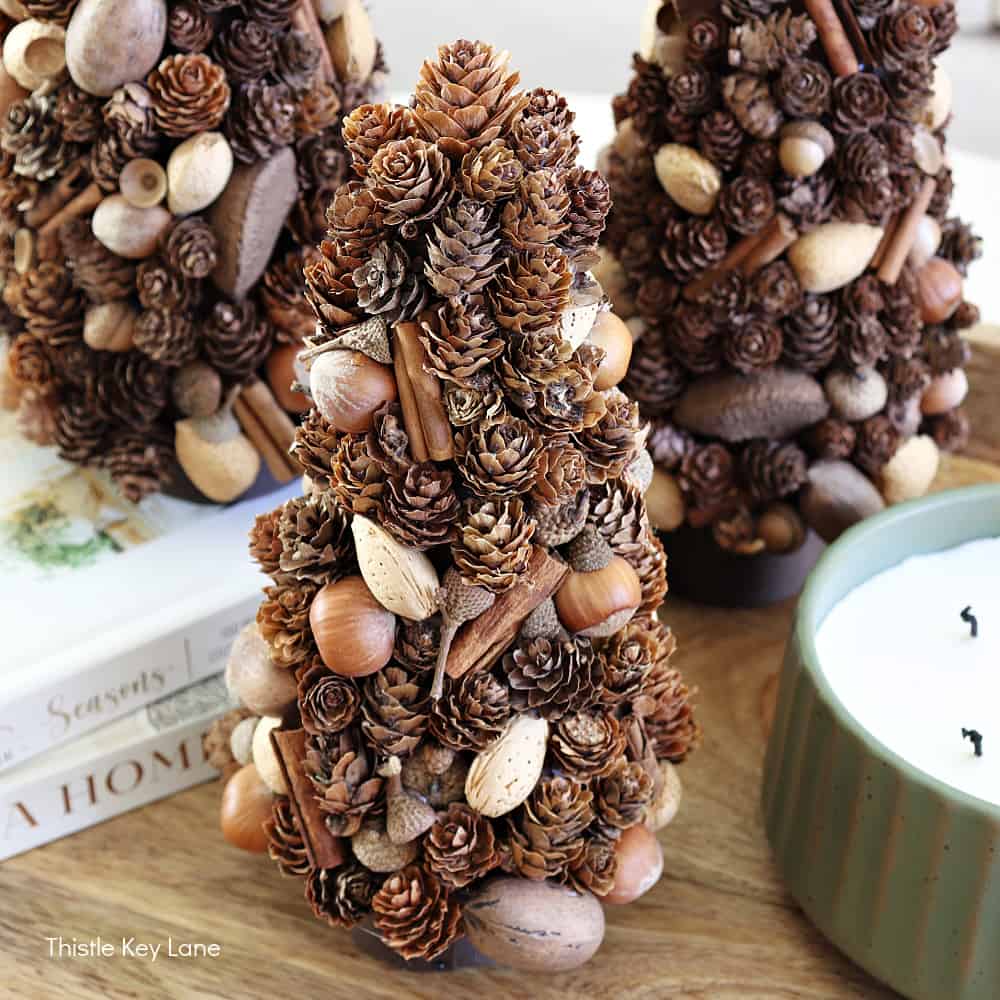
How To Make Pinecone Trees. Today I’m sharing a holiday craft combining mini pinecones with other organic elements to create decorative pinecone trees. This a simple project that you can finish in just a few hours depending on how many you want to make.
This post contains affiliate links. As an Amazon Associate, I earn from qualifying purchases. Please see my disclosure page for more information.

November Handcrafted Society
It’s time for our Handcrafted Society monthly get together hosted by Wendy of WM Design House. If you’re wondering what the Handcrafted Society is all about. Simply put, it’s a group of bloggers who share a love for handcrafted items. Our challenge each month is to take an assigned medium or theme to create whatever our heart desires.
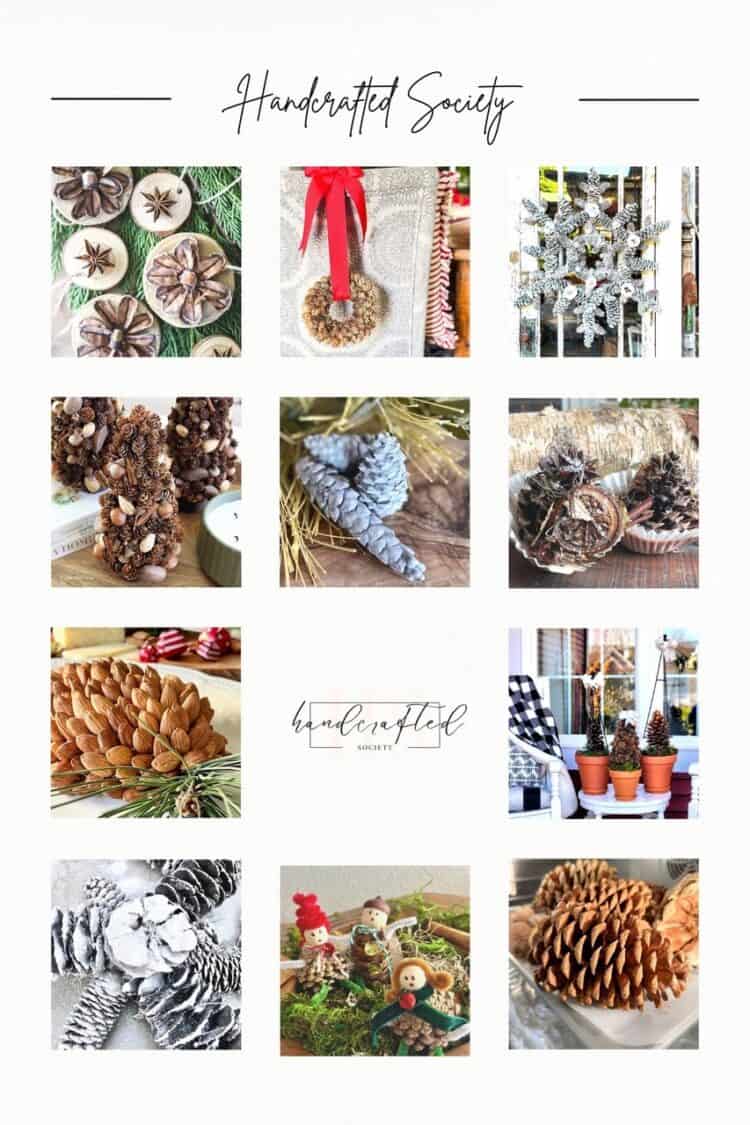
Jennifer over at the Cottage on Bunker Hill chose pinecones as our November theme challenge. I hope you’re ready, this is going to be good!
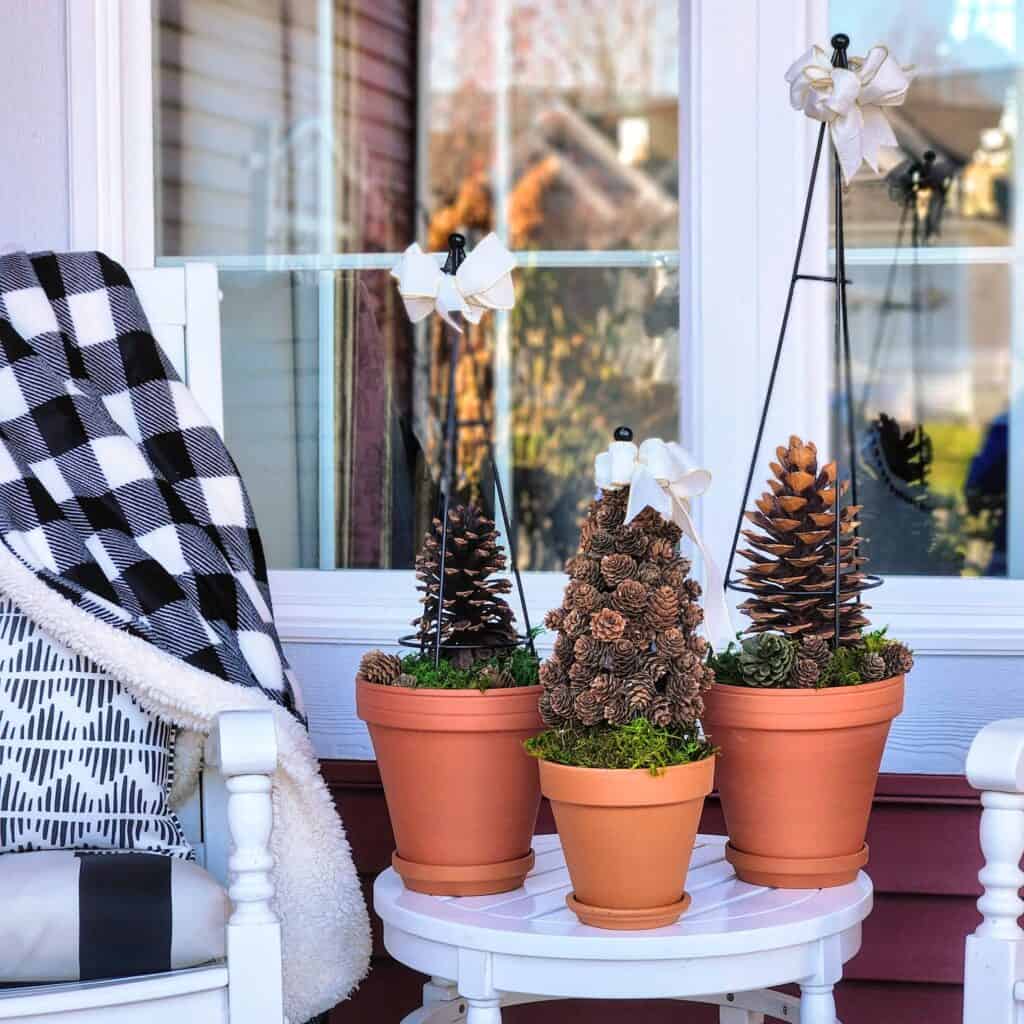
If you happen to be popping in from Hen and House Designs, I’m so happy you’re here. I’m loving Susan’s beautiful project of creating outdoor pinecone topiaries for her porch. We have so many pretty projects to share with you this month, so let’s get to it!
How To Make Pinecone Trees
Pinecones are useful in so many seasonal crafts. We start enjoying them in early fall, through the holidays and into the winter months. They always look so pretty mixed with other natural elements, and every year we find more ways to decorate with them.
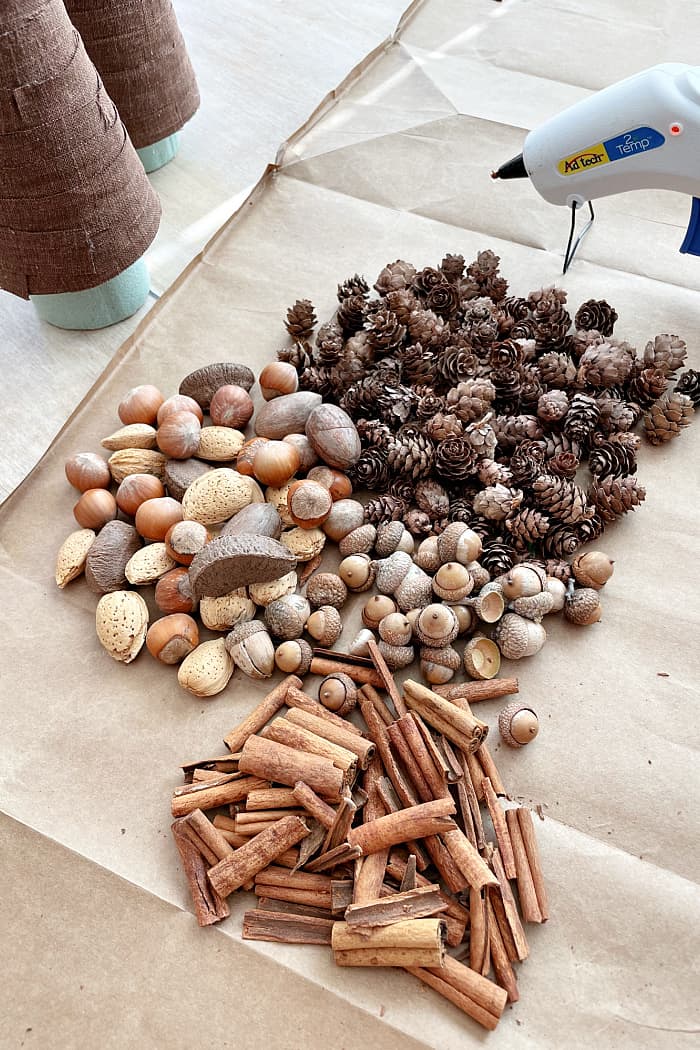
For this project, I’m using mostly mini pinecones ranging in size from half an inch to an inch and a quarter. The unshelled nut compliment the pinecones adding a contrast in colors and shapes.
Supplies And Shopping links
- styrofoam cones
- styrofoam cylinder (optional)
- glue gun and glue sticks
- brown fabric
- scissors
- mini pinecones
- cinnamon sticks (cut in pieces)
- variety of unshelled nuts (pecans, almonds, hazelnuts, Brazil nuts)
- acorns and acorn caps
- ribbon
Getting Started
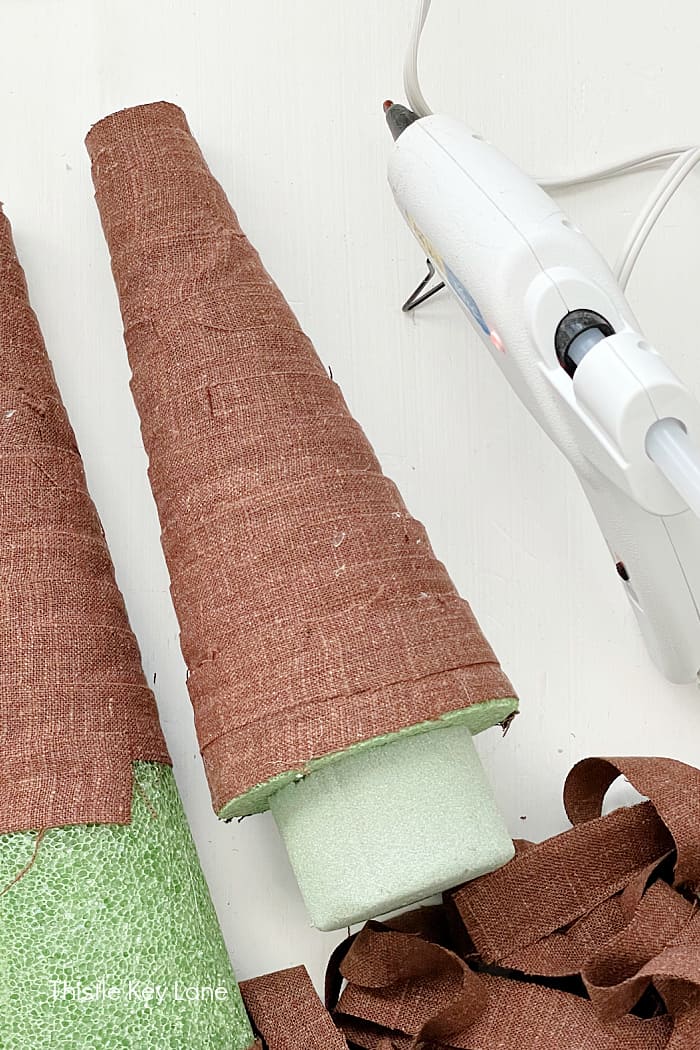
The first step is creating a base for your cone tree. I cut a 2.5″ x 4″ foam cylinder into three sections then attached them with hot glued to the base of each cone. I find that a serrated knife is easiest to use when cutting styrofoam. (You can opt out of this step if you want your trees to sit flush on your tabletop.)
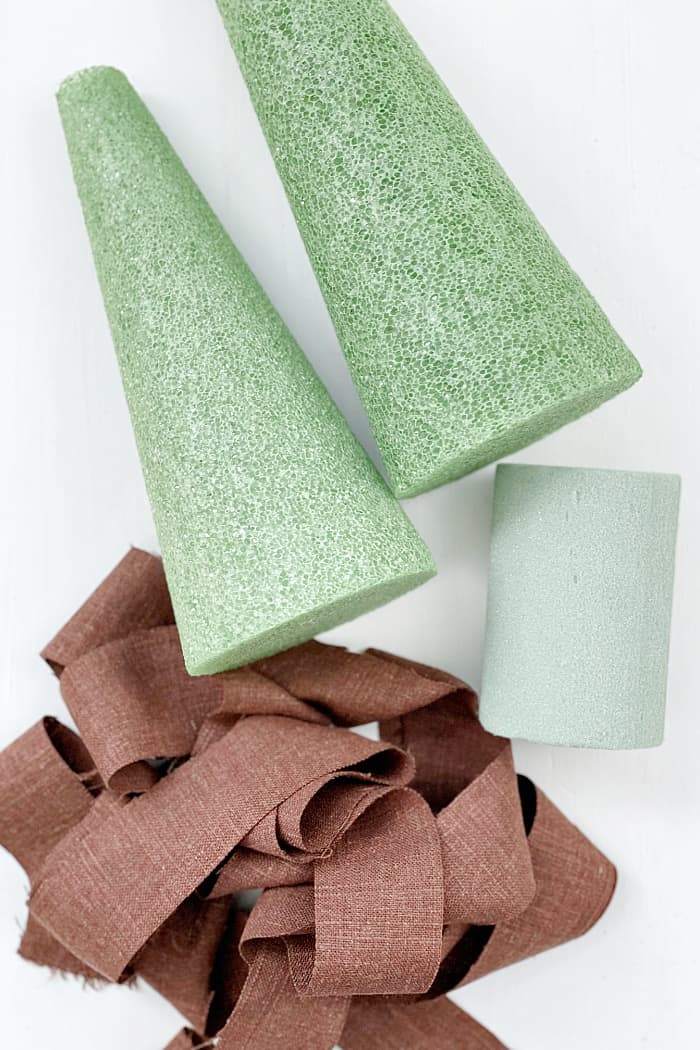
Next step is to attach strips of brown fabric using your hot glue to cover your cones. The fabric provides a good surface for attaching the pinecones and nuts. It also creates a dark background, so you don’t see the light green styrofoam through any small cracks or empty spaces.
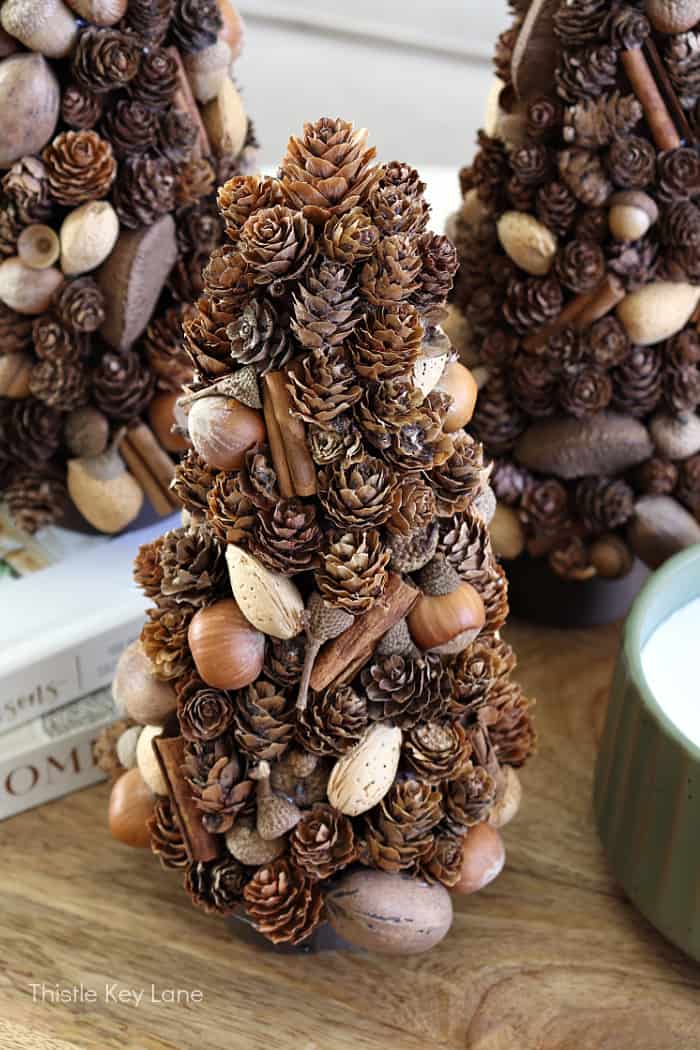
To decorate, start at the base of the cone using your hot glue gun to attach mini pinecones, unshelled nuts, acorns and cinnamon sticks in a random pattern. Then work your way around and up the cone covering it completely.
By the way, it may not be easy breaking cinnamon sticks in half, so I suggest using garden clippers. If the cinnamon sticks are too skinny, try gluing several pieces together to get the look you want.

Tiny pinecones are really good for filling in small spaces, as well as the acorns and acorn caps. I think you’ll find the unshelled nuts help to add interest with their unique shapes, colors and textures. Because the almonds are the lightest in color, I did make a conscious effort of spacing them out in order to balance the overall look of the trees.
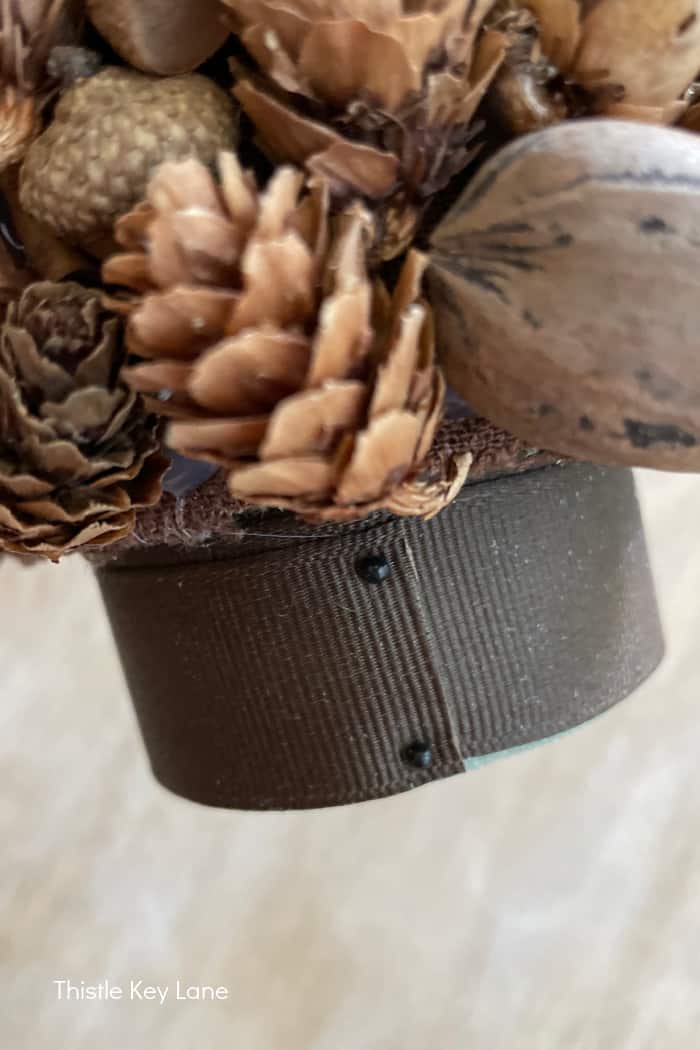
The last step is covering the base of the tree. I’m using brown ribbon to wrap around the styrofoam base securing it with straight pins. You can also use hot glue if you don’t have pins.
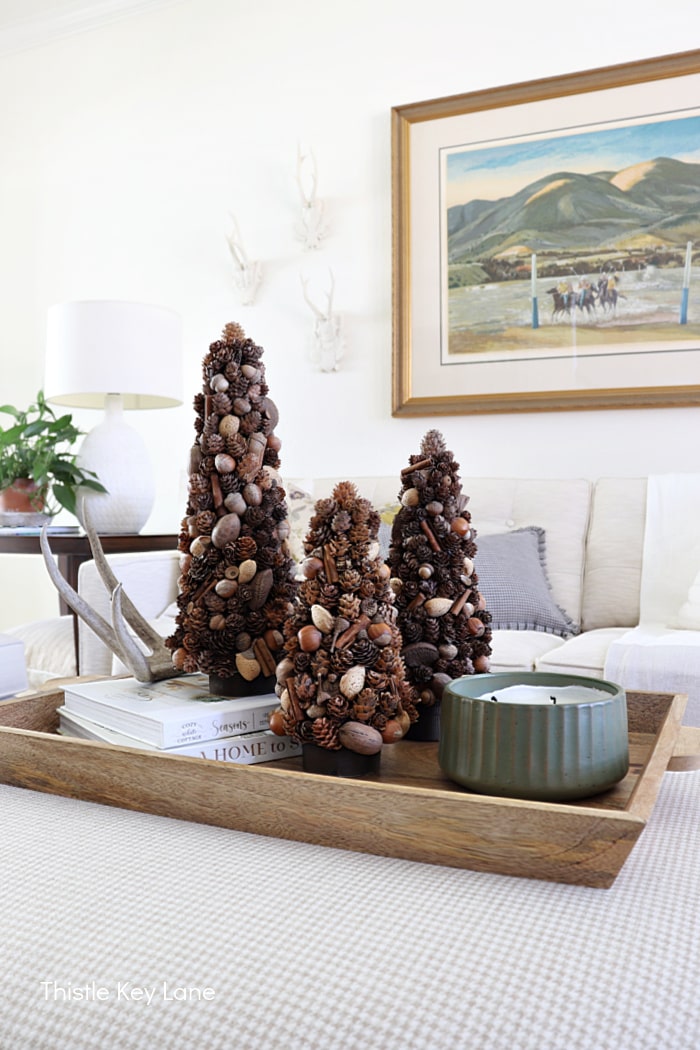
Styling Pinecones Trees
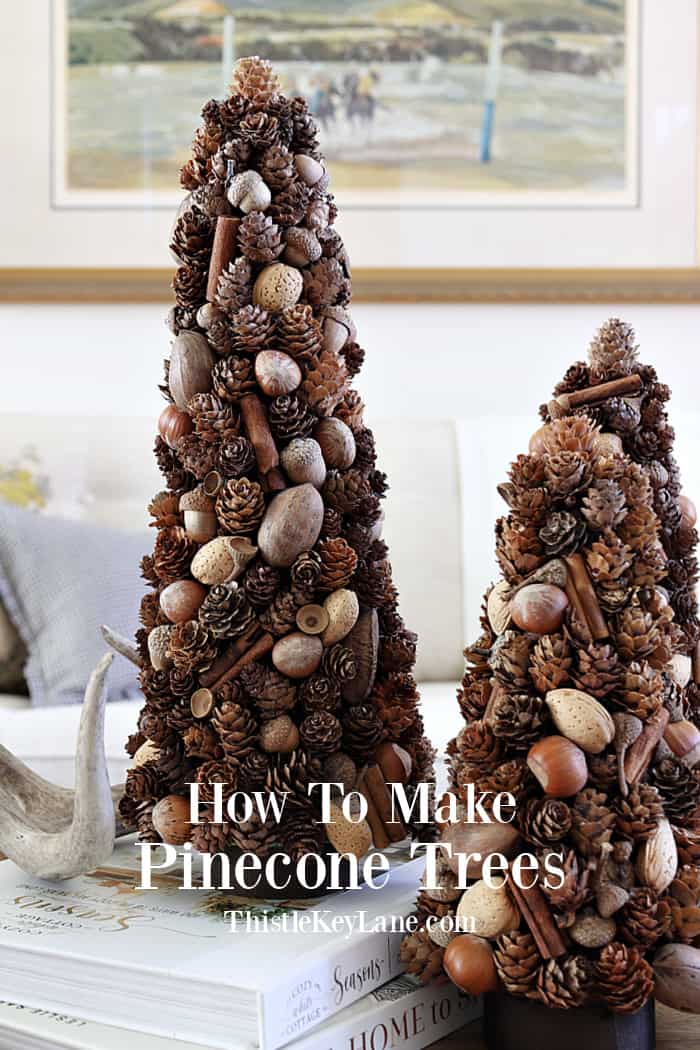
Pinecones trees will fit on almost any tabletop, shelf, mantle or use as a centerpiece. I think they are pretty enough to use all by themselves or in a grouping with greenery. You can also mix them with other types of cone trees for an eclectic look.
Right now I have them sitting on the ottoman in the living room on a tray, but I may try them out on the entry table. You’ll have to come back for my Christmas tour in a few weeks for more ideas.
If you have leftover supplies from this project here’s how you can use them until your next project comes along.
- display mini pinecones in a silver bowl on a side table
- add unshelled nuts in a wooden bowl
- mix pinecones and nuts in a glass hurricane around a candle
- use cinnamon sicks in a simmering pot or as a stir stick for your tea or coffee
- string mini pinecones together to make a garland
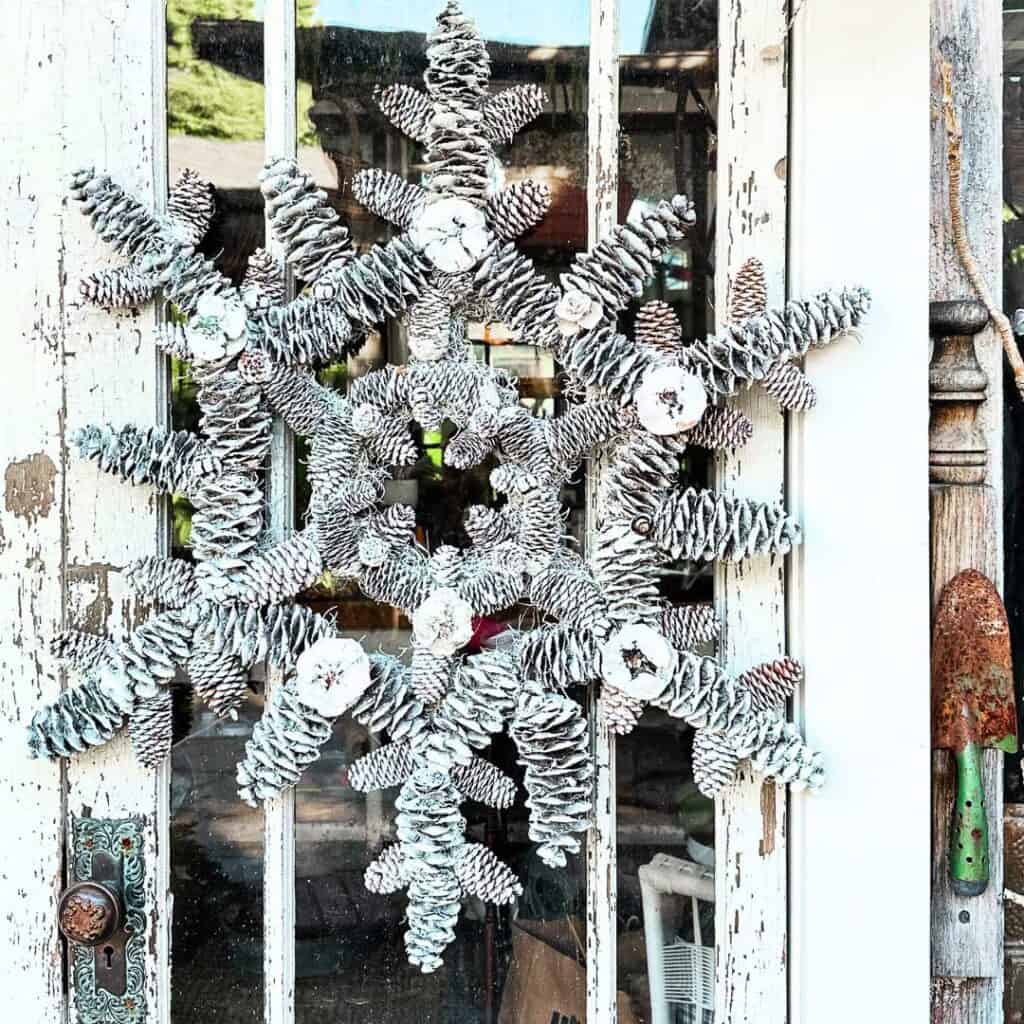
Several years ago I created a fall wreath with a similar look as these pinecone trees I’m sharing today. Be sure to check out the post by clicking on DIY Fall Wreath.
Be sure to follow Thistle Key Lane on Pinterest, where the boards are up to date with decorating ideas you can use right now!
Up Next
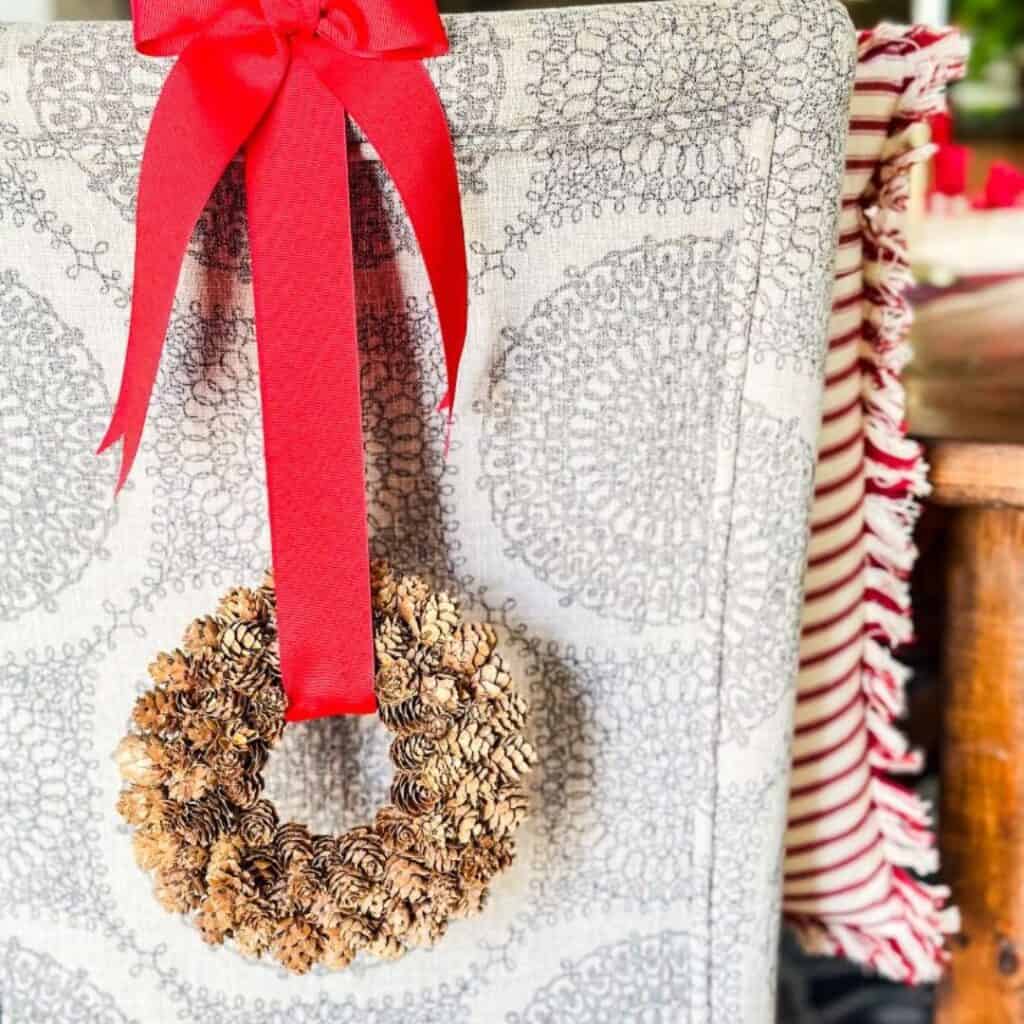
Up next on our Handcrafted Society hop I’m sending you over to visit Kim of Cottage In The Mitten who is our guest blogger this month. She’s sharing darling mini pinecone wreaths to display on the back of dining chairs. I know you don’t want to miss Kim’s project!
Thank you so much today for stopping by and joining it the fun with us! If you have any questions about how to make pinecone trees let me know in the comments.
Cheers!


Such an elegant project, Michelle! I love all of the cinnamon sticks and nuts that you added to the pine cones. Stunning!
Thank you Missy! I’m so happy with how they turned out!
These came out so cute Michelle. I love the idea of wrapping the cones with fabric before attaching the pinecones. Thanks for joining us today.
Thank you Wendy! What a fun challenge this month. Thank you so much for organizing!
I love how these turned out, Michelle! I may have to make one with the small pinecones I have left over. So nice joining you ladies, this month! Happy Holidays!
I have left overs too and thinking about making a few of your wreaths! 😊 Thanks for joining in this month Kim!
I just love these!! They are perfect for the wintertime.
I’m so glad you picked pine cones this month Jennifer! Such a fun challenge!
I just love these Michelle! Adding the ‘extras’ to the pinecone was just perfect!
Thank you Susan! This was such a fun challenge this month!
These are just stunning Michelle!!
Thank you so much Kristin! It was such a fun project! 😊
These are so adorable and well done. I am on the lookout for such cute ideas to make this year. This will most probably make the list if I can find all the ‘ingredients’ to make it
Saw your post on Tuesday Turn About.
My entries this week are numbered #53+54+55
Please join us weekly