As I was preparing to make a DIY fall wreath for the season, I remembered my mom and her friends from a ladies club making fall wreaths with pinecones and pecans. At the time it seemed like a huge production. I thought they were crazy, which is a normal reaction for a ten-year old, but all the wreaths turned out beautifully.
My mom’s wreath was placed in the middle of our square coffee table with a large glass hurricane, and a candle in the center. Perfection!
After all these years, I wanted to make one too or at least something like it. Here’s a list of supplies you will need to make your own DIY Fall Wreath.
DIY Fall Wreath Supplies
- foam wreath
- fabric cut into strips or ribbon
- scissors
- glue gun and glue sticks
- small pinecones
- unshelled mixed nuts
- vase filler (optional)

I have bags and bags of vase filler in various colors and shapes of natural materials. These make an interesting mix with the unshelled nuts and pinecones. (And I thought my mom was crazy!)
DIY Fall Wreath
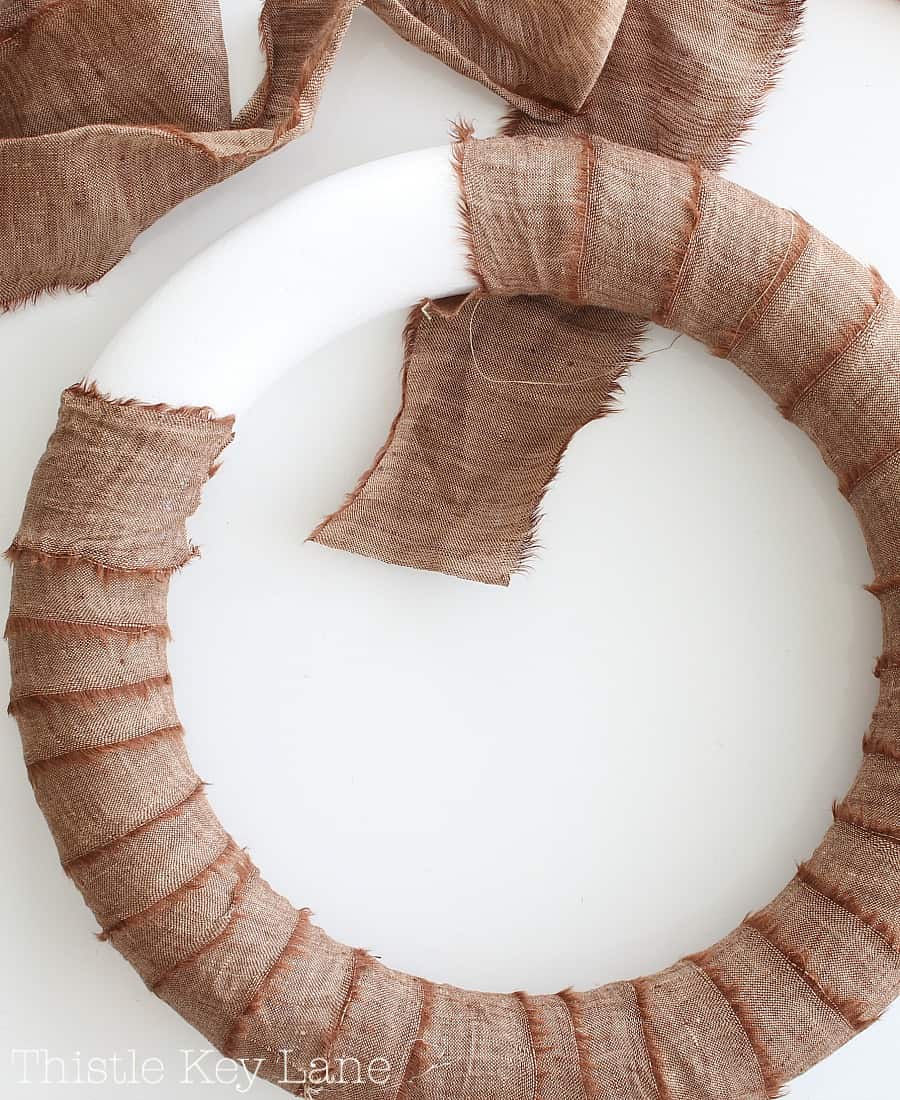
First step is covering the foam wreath form with torn strips of brown linen. Burlap or brown ribbon will work just as well.
The strips of fabric are between 2 and 3 inches wide and about 36 inches long. Depending on how much you overlap the fabric, you will need about 4 strips of fabric.
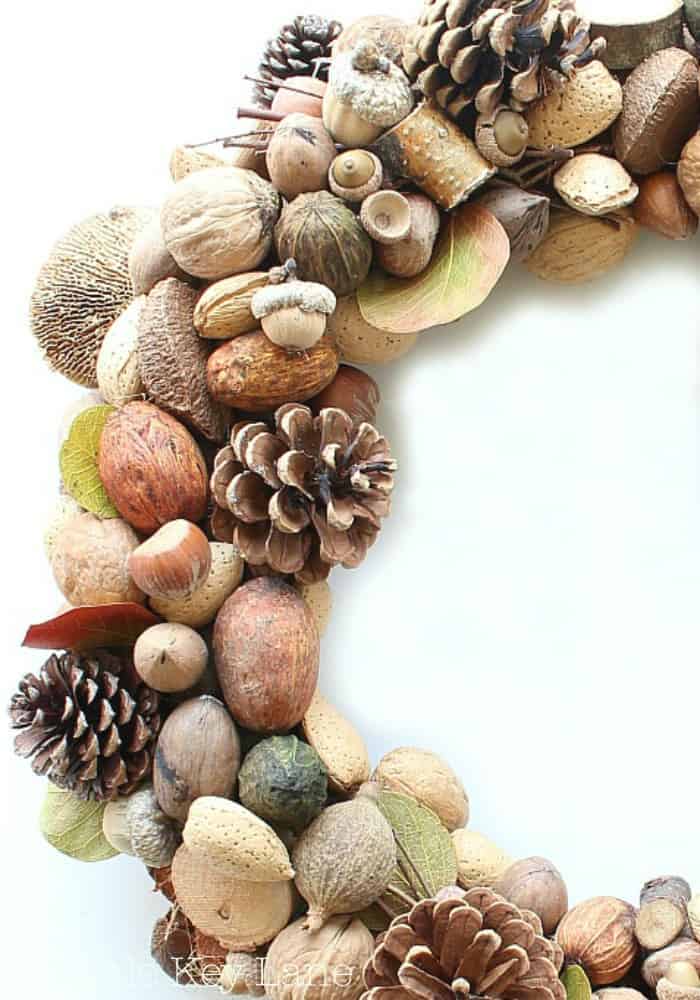
After covering the wreath with fabric use a hot glue gun to secure the pinecones into place. Once the pinecones are spaced around the wreath, fill in the spaces with unshelled nuts and pieces of vase filler until the wreath is complete.
This project will take a little bit of patience, because it takes a lot of glueing to cover the wreath.
Keep in mind to vary the direction and position of the different pieces. For example, some of the nuts are flat while some are on end. The same goes for the pinecones, which are pointing in random directions.
Last step is wedging leaves into areas needing coverage and to balance the overall look. The delicate texture of the leaves compliments the hard shells and pinecones. Just something to think about when you are gathering your materials.
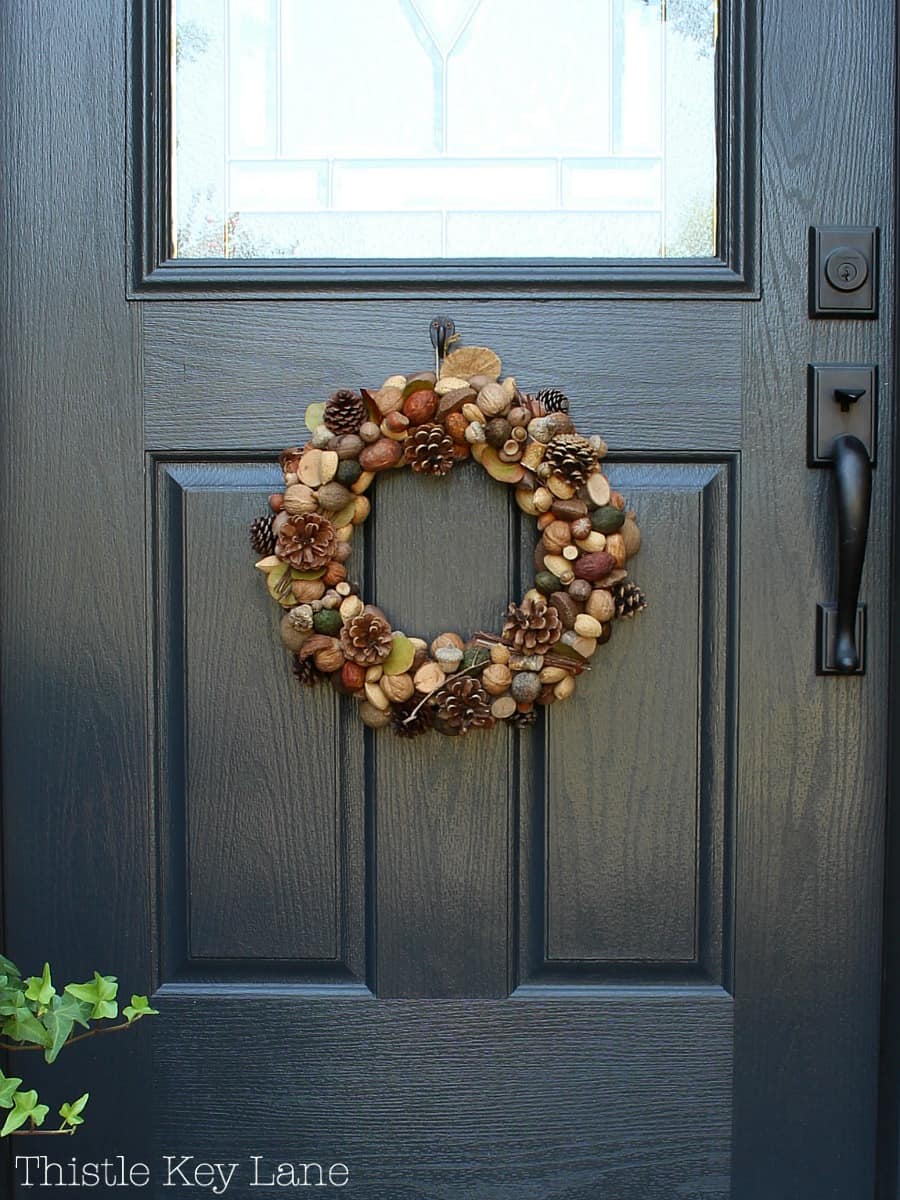
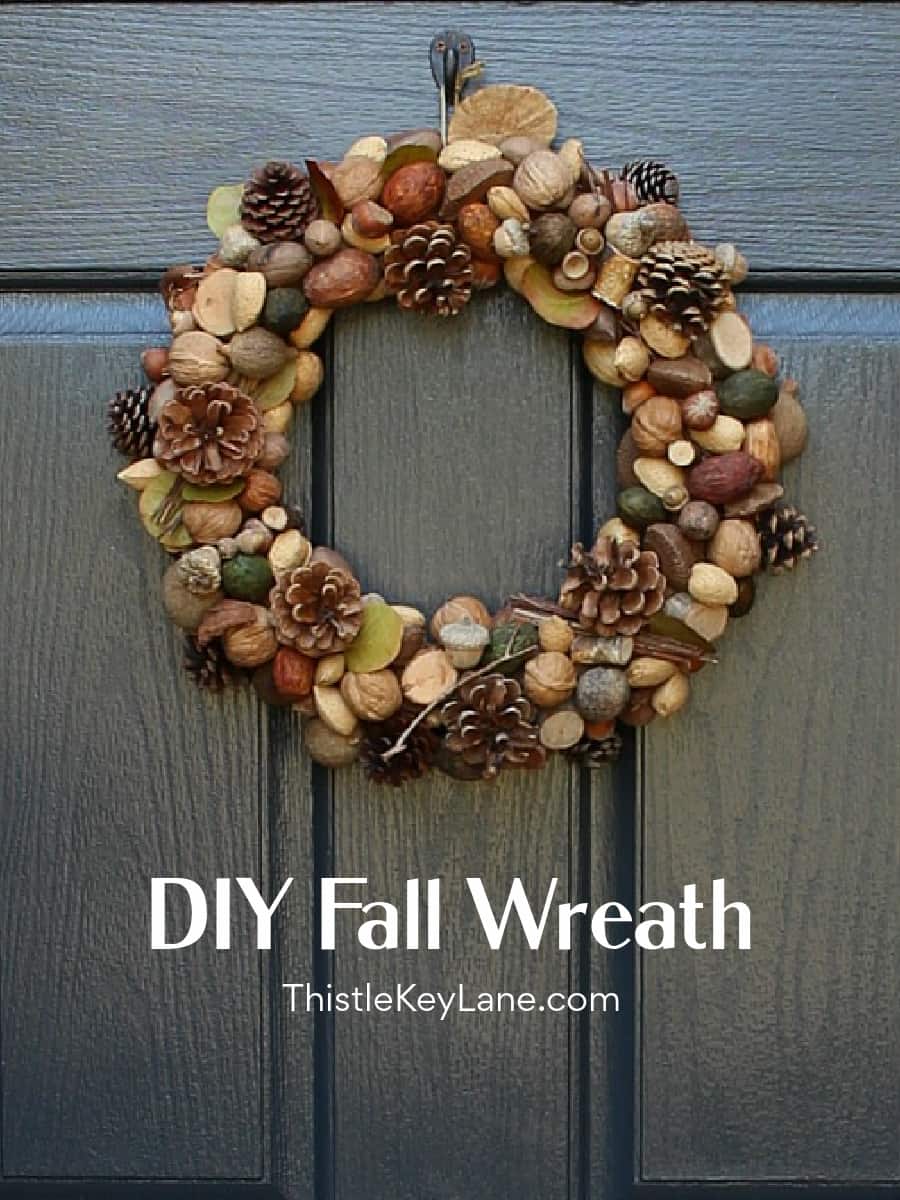
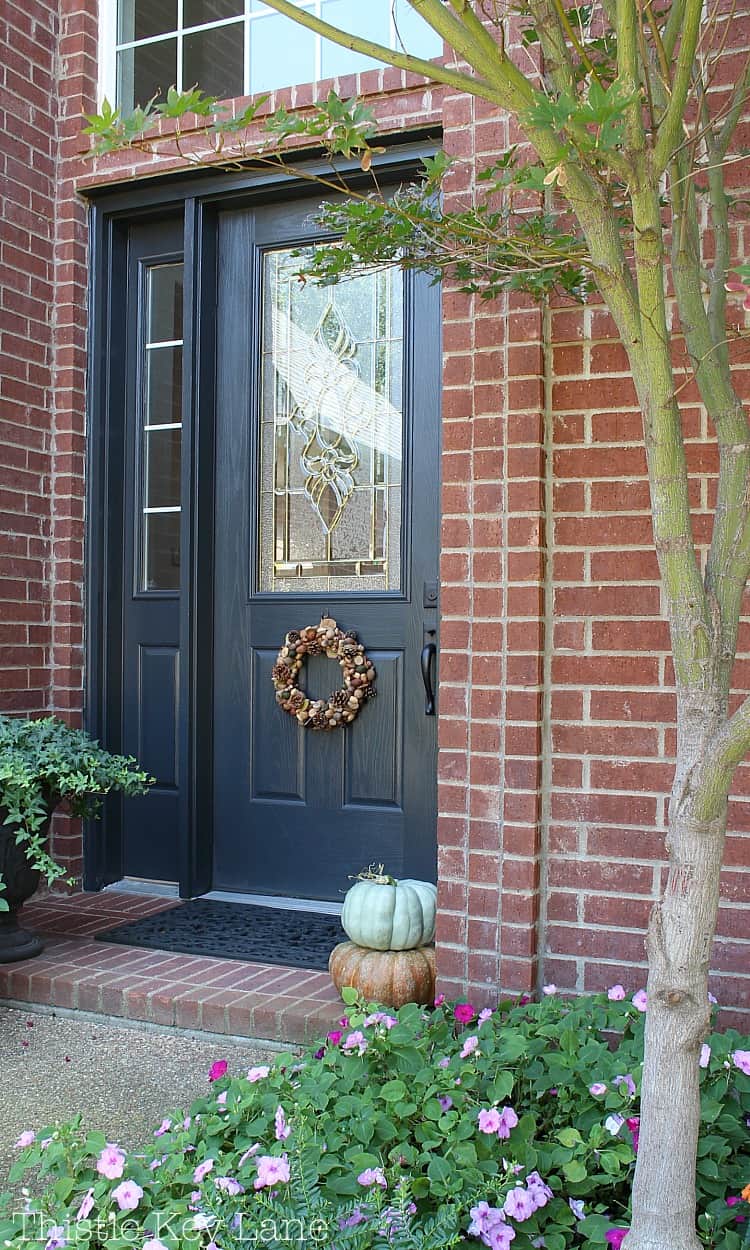
I’m so happy with how the wreath looks. My first thought was that it might be too dark for the front door, but it actually shows up really well.
This may be a fall wreath, but you might consider using it through Thanksgiving and Christmas. Depending on the type of porch you have, I suggest bring the wreath inside to protect it from bad weather.


Thank you for stopping by! Let me know what kind of DIY fall wreath you’re making, and how it turns out.
Cheers!
Sharing on the following link parties – Style Showcase, The Creative Circle, Feathered Nest Friday, Wow Us Wednesdays, The Scoop and The Inspiration Gallery
©2017 DIY Fall Wreath was first published on Thistle Key Lane™
Save


I pinned it! Beautiful!
Thanks Kelly! I’m working on a fall printable you will love, so check back later this week. 🙂
That’s beautiful!
Thank you Christine, so glad you stopped by!
Love this!
Thank you Katherine, so happy that you do!
WOW ! I’m so impressed that you make this lovely fall wreath just using some small pinecones, mixed nuts and vase filler. As a DIY’er, I also make a nice fall wreath. Thanks
Thanks so much Rebekah! Looking forward to visiting your blog!
Oh my goodness! I totally remember my grandmother making a wreath like this in the 70s. Also something similar on a long and narrow wall hanging.
It was probably before glue guns were available. These kinds of crafts are so much easier now!
I just saw your wreath on Paula’s round-up! I’m so glad she featured you or I would have missed this! Love it!
Thanks Julie! I still love this wreath and use it every year.
This is gorgeous Michelle!!
Thank you so much Jennifer!
I love this wreath!!! I can’t imagine how sore your fingers must have been after hot gluing all those nuts and pine cones. Anyway, the end result is beautiful!
Thank you so much Anna! This projects takes a lot of glue LOL!
That looks amazing!
Thank you Marie! It takes a lot of gluing LOL!
This is so pretty on your door! Thank you for sharing it with us on Farmhouse Friday 322. I’ll be featuring it this weekend. Always love what you do. pinned
Wow thank you so much for the feature Cindy! Hugs!
I think this is one of the prettiest Fall wreaths I’ve seen! So much texture and layers of color. Fabulous for the season!
Thank you so much Rachel! Hugs!
This is the first “DIY Fall Wreath I actually like the look of! Beautiful and natural and so seasonal. Nothing hokey or cheap looking here. Thank you!
Thank you so much Sherry! The natural elements get all the credit!