Learning How To Make Block Print Art | A Beginner’s Introduction. See how to create art through the process of block printing with this simple introductory step by step guide.
Handcrafted Society
This month our Handcrafted Society is focusing on handmade block prints. By definition block printing is creating a pattern, text or design by carving into a material such as wood, rubber or linoleum, then transferring that design to fabric or paper with ink. Block printing is a fascinating craft that I’m learning one step at a time, and I’m so excited with the process so far. If you are not familiar with block printing, then I hope this introduction will inspire you to give it a try.
Learning How To Make Block Print Art | A Beginner’s Introduction
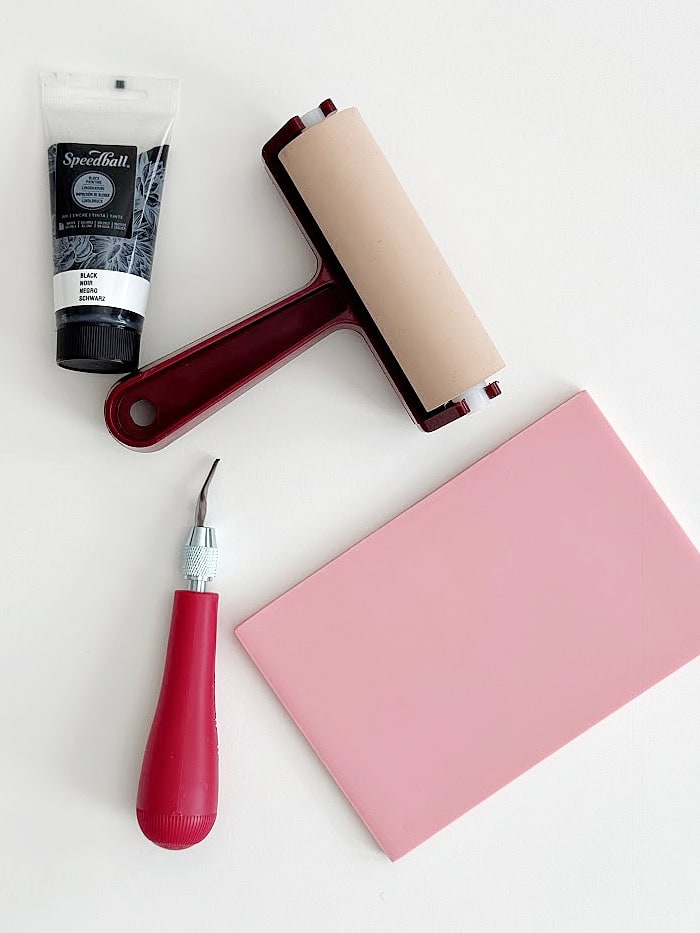
In my post, I’ll show you step by step how to create a block print on paper for framing. To start you may want to invest in a few tools and supplies. I purchased a starter kit, although I suggest buying a kit that includes an ink tray and a set of inks too.
Supplies For Block Printing
- rubber blocks
- carving cutters
- brayer
- ink
- ink tray
- utility knife
- printmaking paper
- tracing paper
- pencil
Creating And Transferring your Design
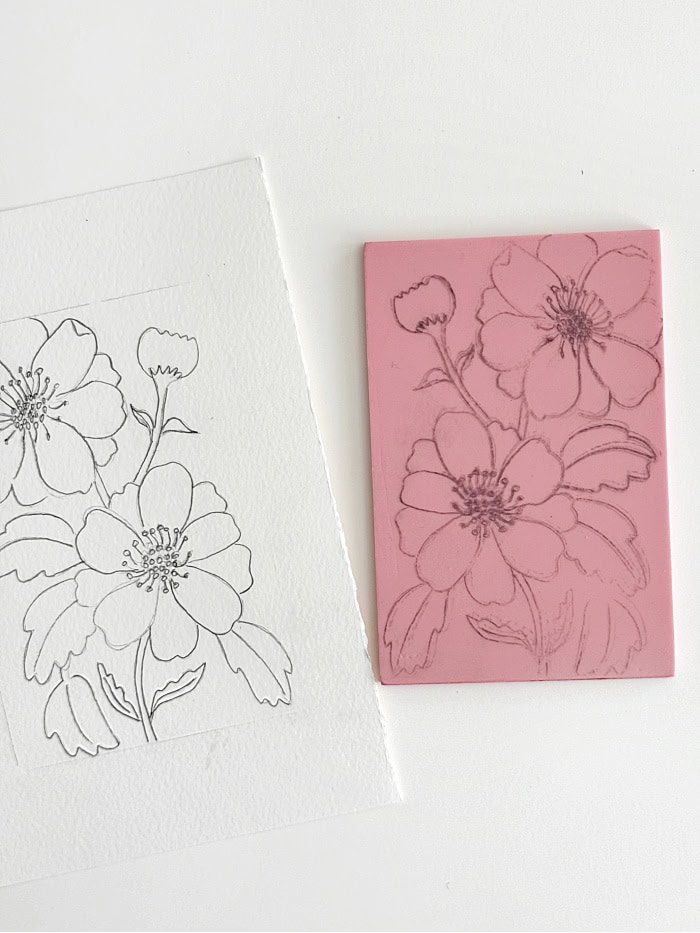
To start, either draw your own design on paper or trace an image using a pencil and tracing paper. Then you can transfer that image by placing it on top of your rubber block.
The pencil markings should transfer easily by rubbing your palm over the back of your paper. Remove the paper and you will see your pencil markings on the block. If some marks or lines are not dark enough then go over them with your pencil. Notice your design or text will be a mirror image on the block.
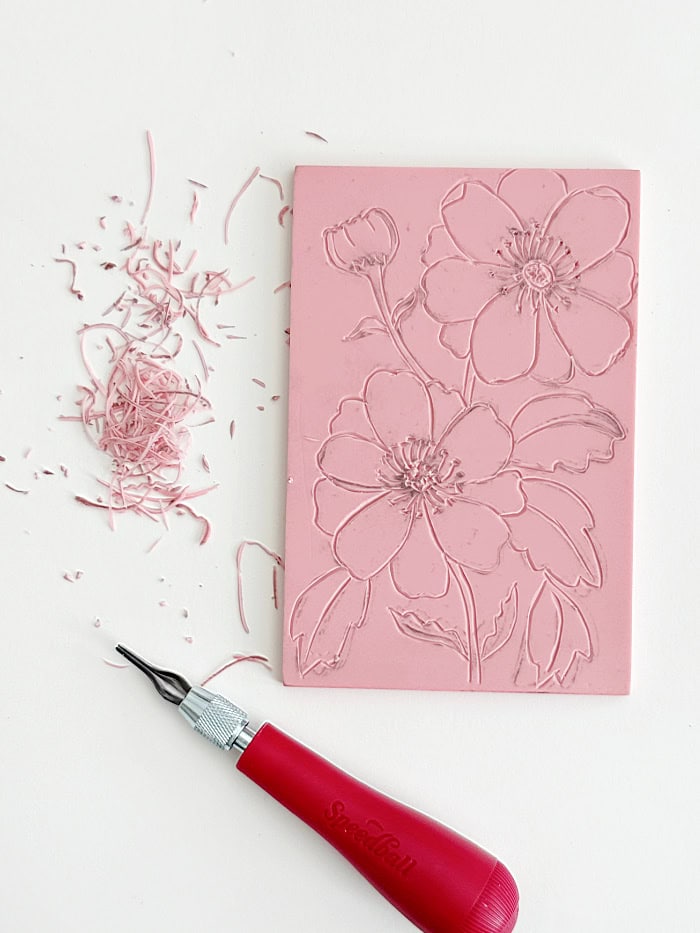
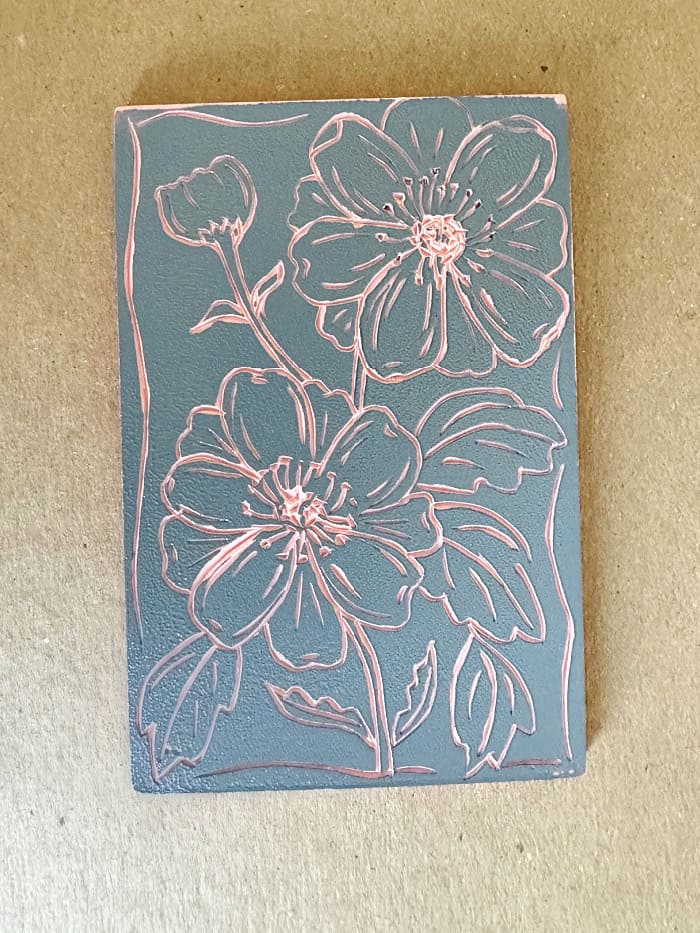
Carving
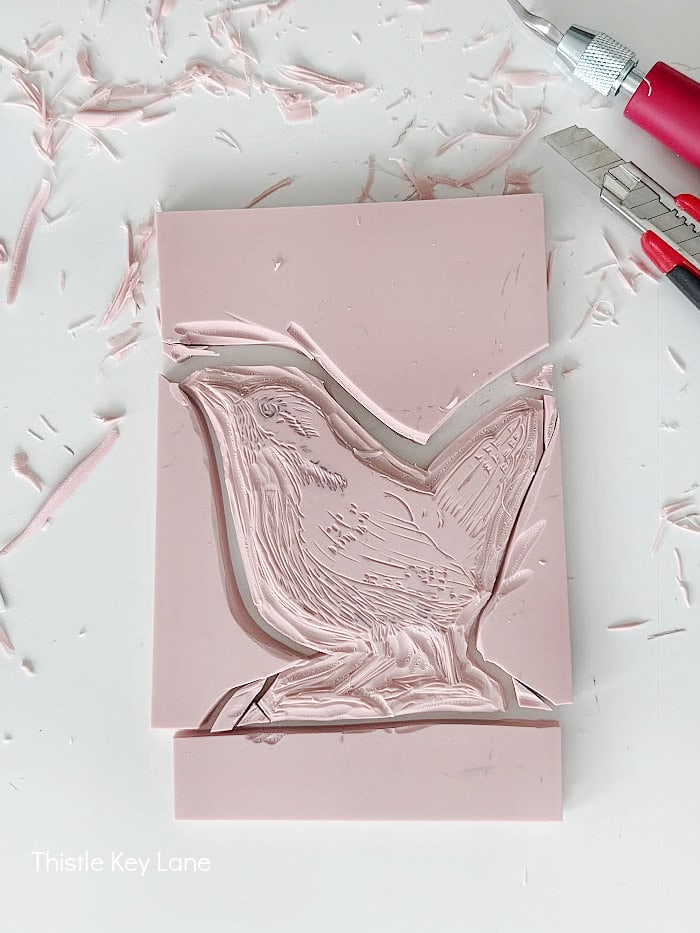
Since I’m just learning how to use a carving tool, I’m keeping my designs simple with a minimal amount of detail. My first design is large flowers with leaves that cover most of the block.
Using the smallest V cutting tool, I’m carving just the pencil outlines. This may take a bit of practice, but after a while your carving will get more consistent and precise.
Applying Ink To The Block and Paper
Start with just a small dab of ink in whatever color you prefer, on a plastic tray. Roll the brayer through the ink back and forth and crisscross until the brayer is evenly coated.
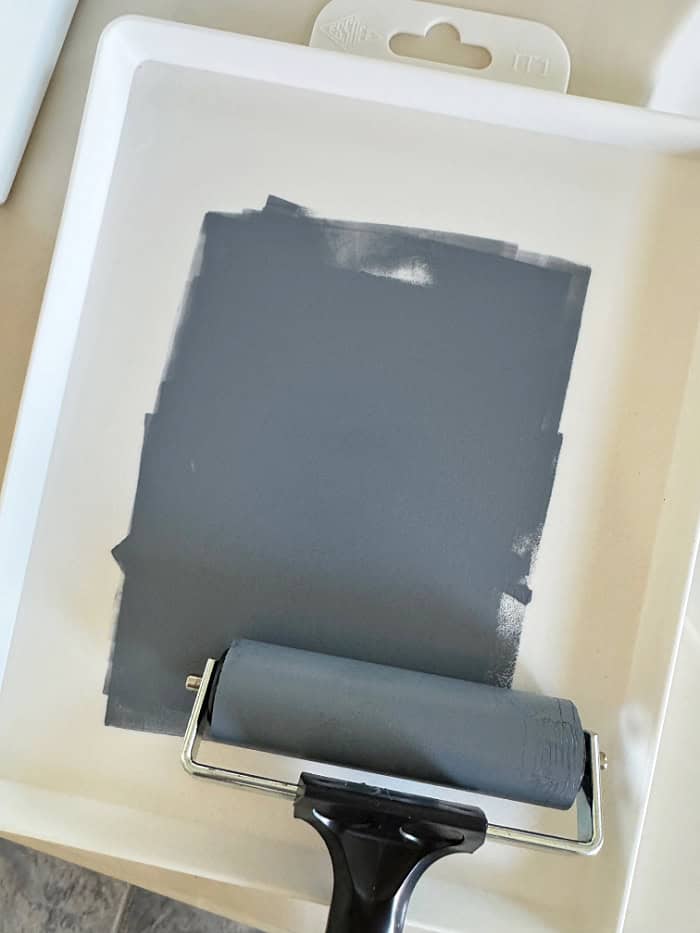
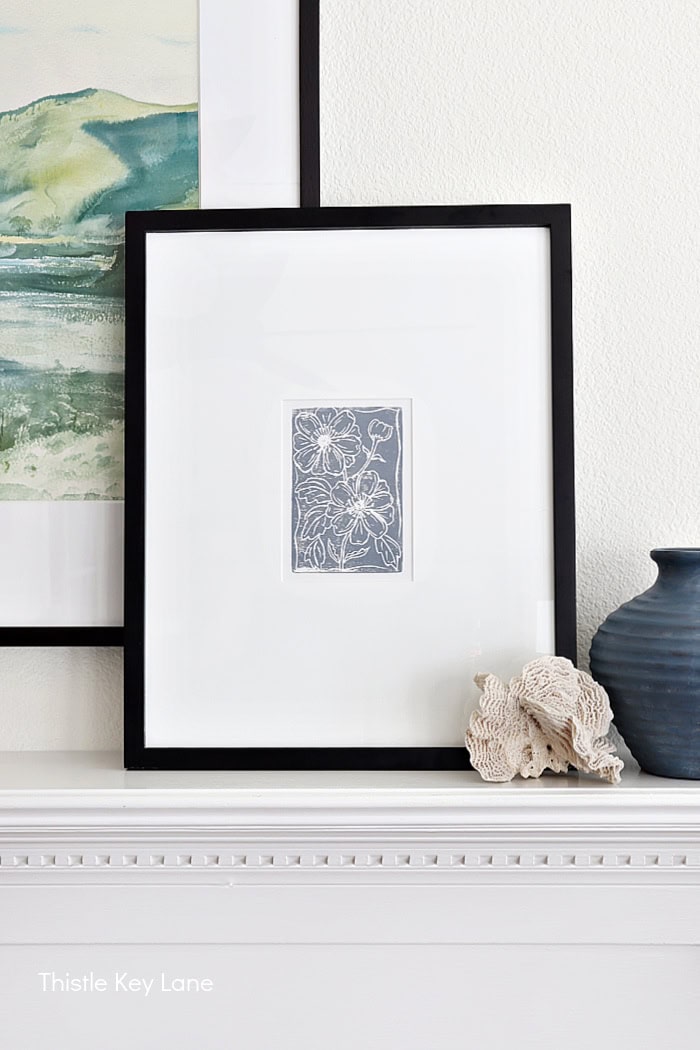
Then roll the brayer across the carved block covering it evenly with ink. Now you can place your paper on top of the block. Press your palm over the paper, making sure you apply even pressure over the whole block. You can also use a baren or heavy book to press the paper on the block to help transfer the ink from the block to the paper. Carefully lift or peal the paper away from the block so you do not smear the image. Now let the ink dry and admire your work.
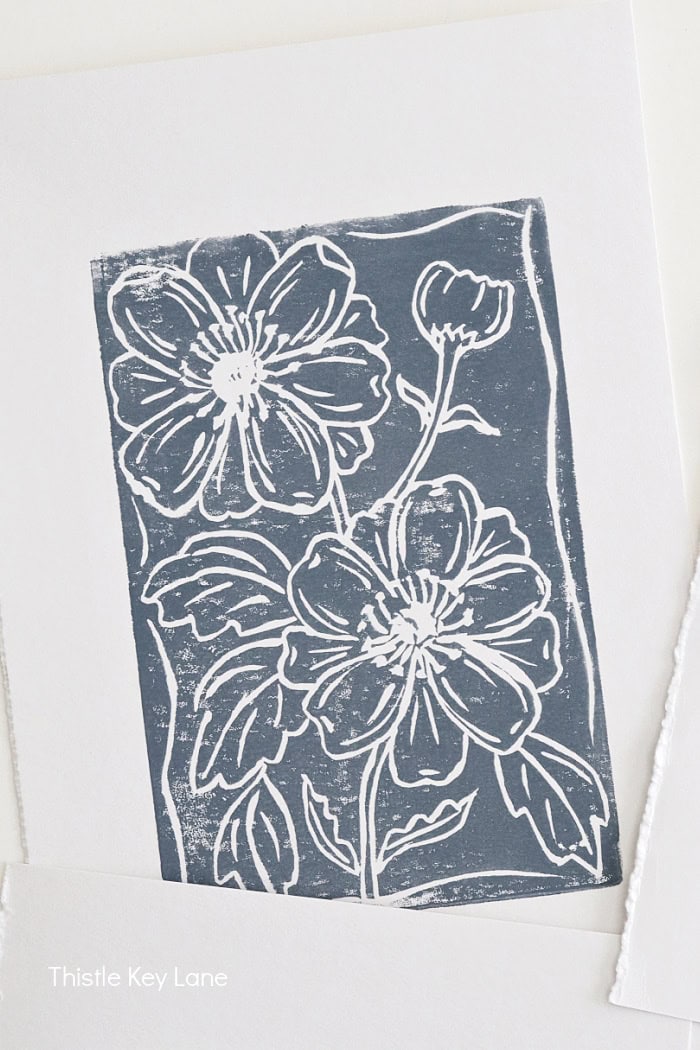
I can hardly describe the feeling of elation I felt when I made my first block print. I think this one will always be my favorite, because it was my first plunge into block printing.
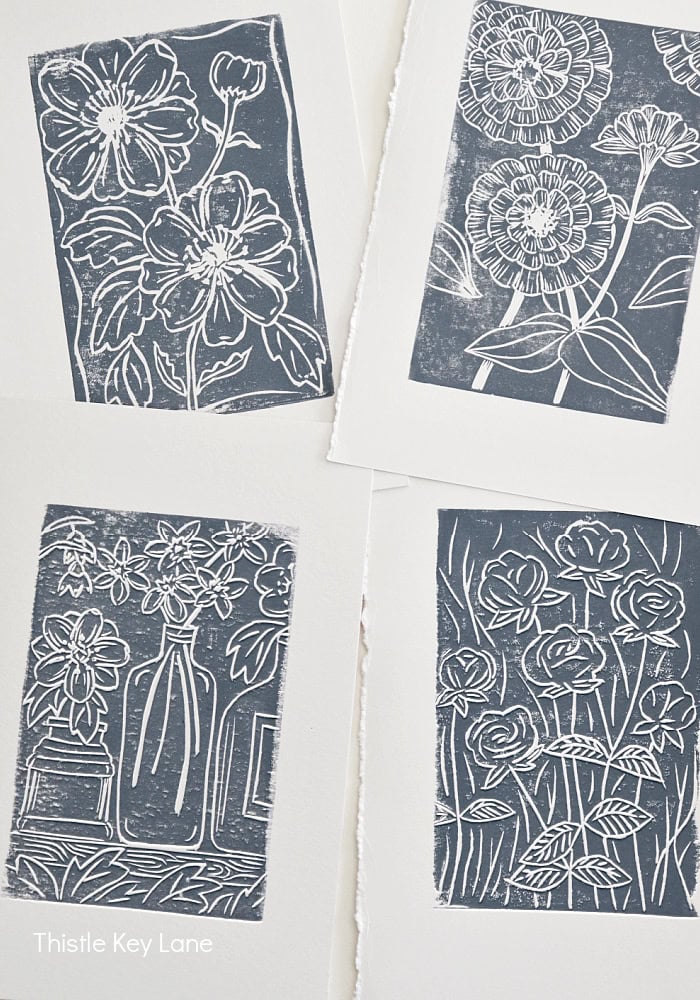
Practice Practice Practice
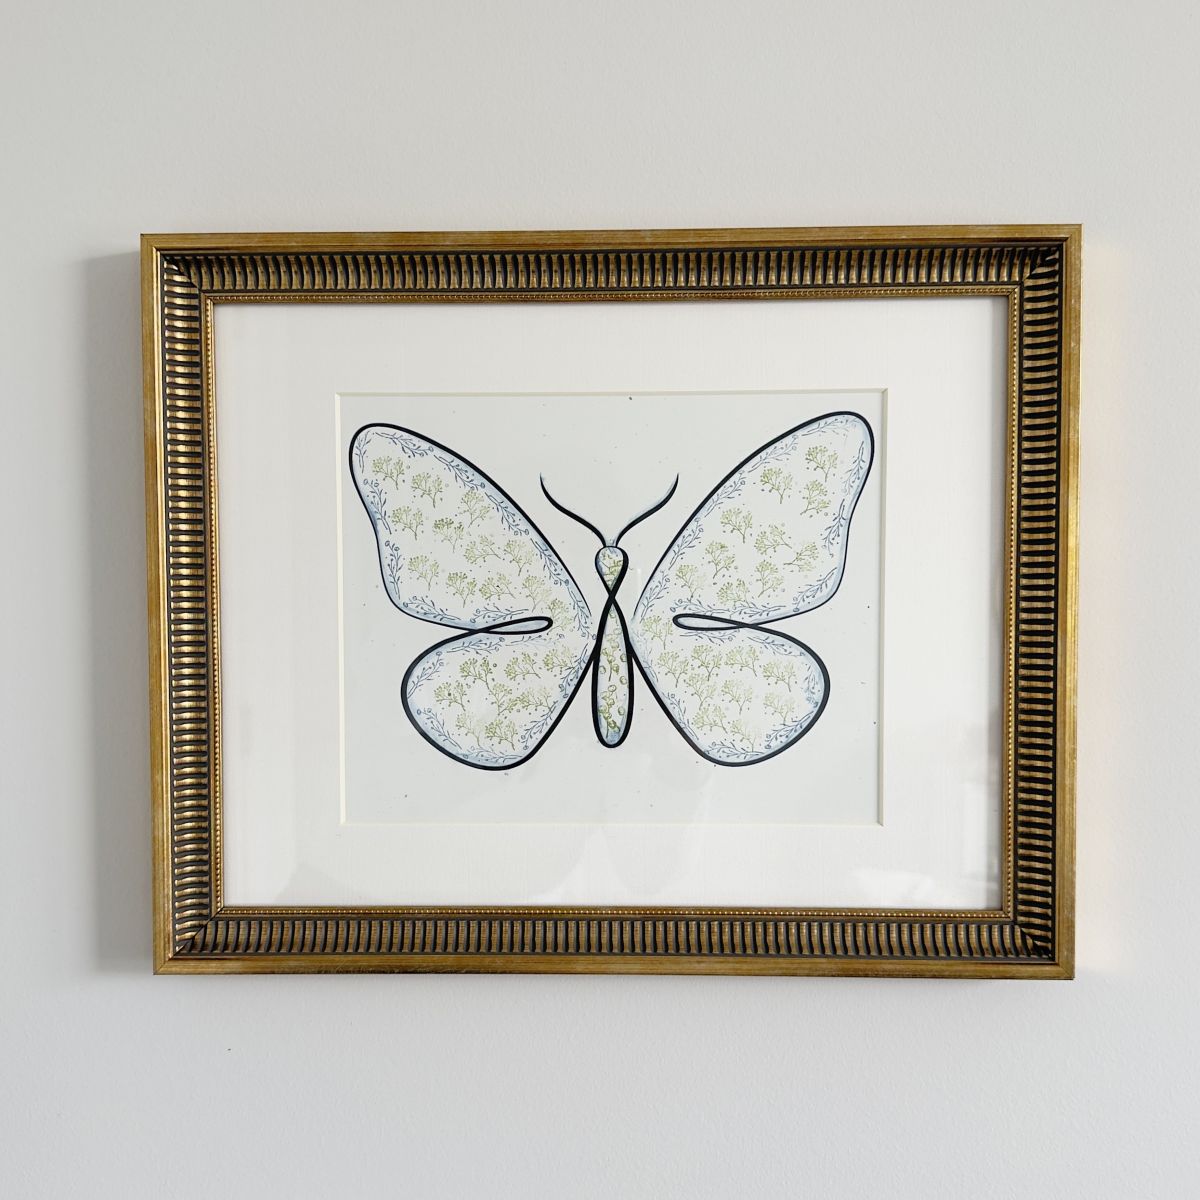
When learning how to make block print art it is so important to practice carving. With every mess up or mistake you will learn something new. This can be a rhythmic slow process, so take your time while listening to an audio book, music or enjoy some quiet time. Here are some of the different types prints with a variety of curved cuts with smaller details.
Different Techniques
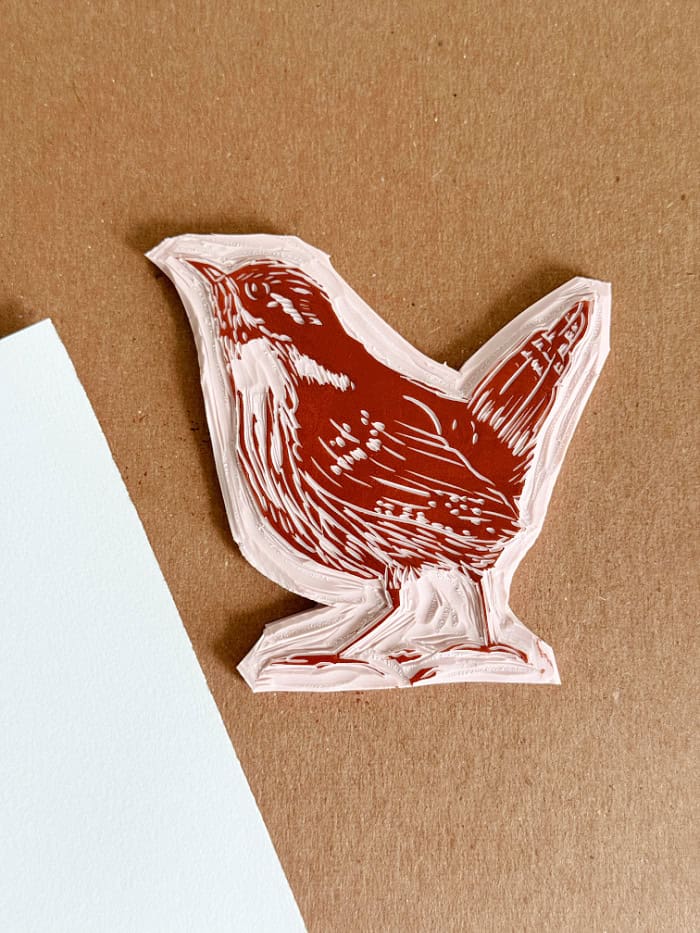
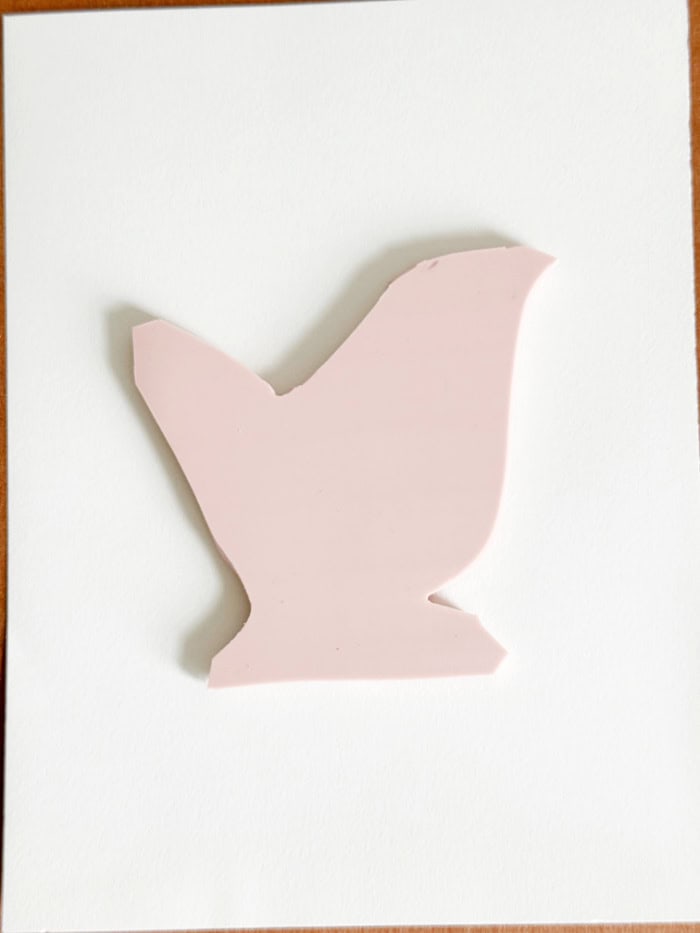
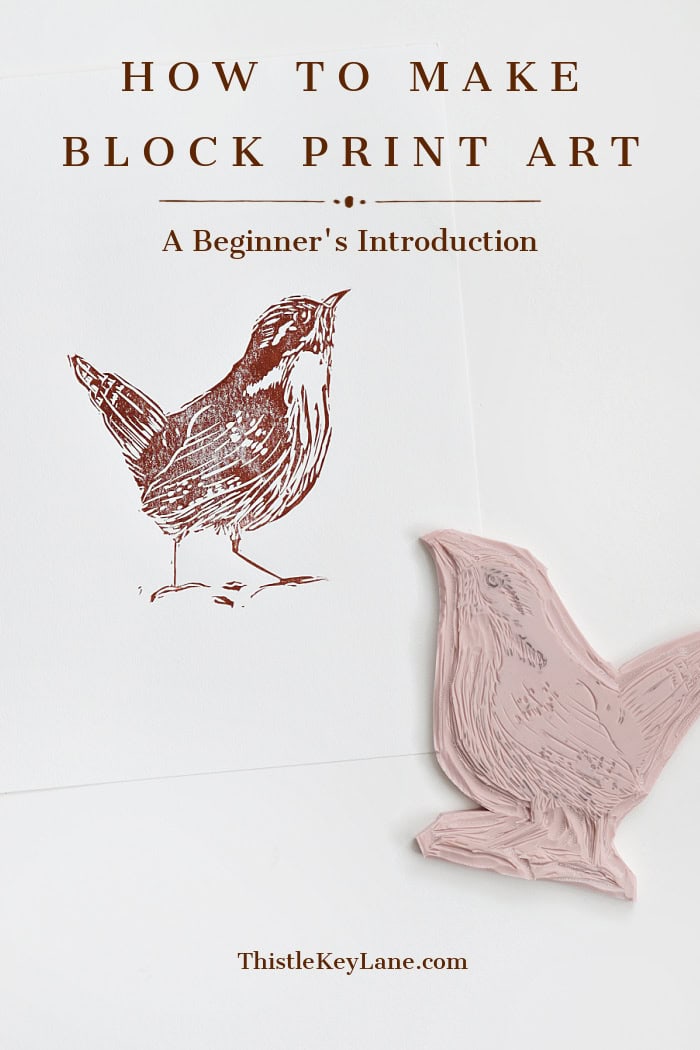
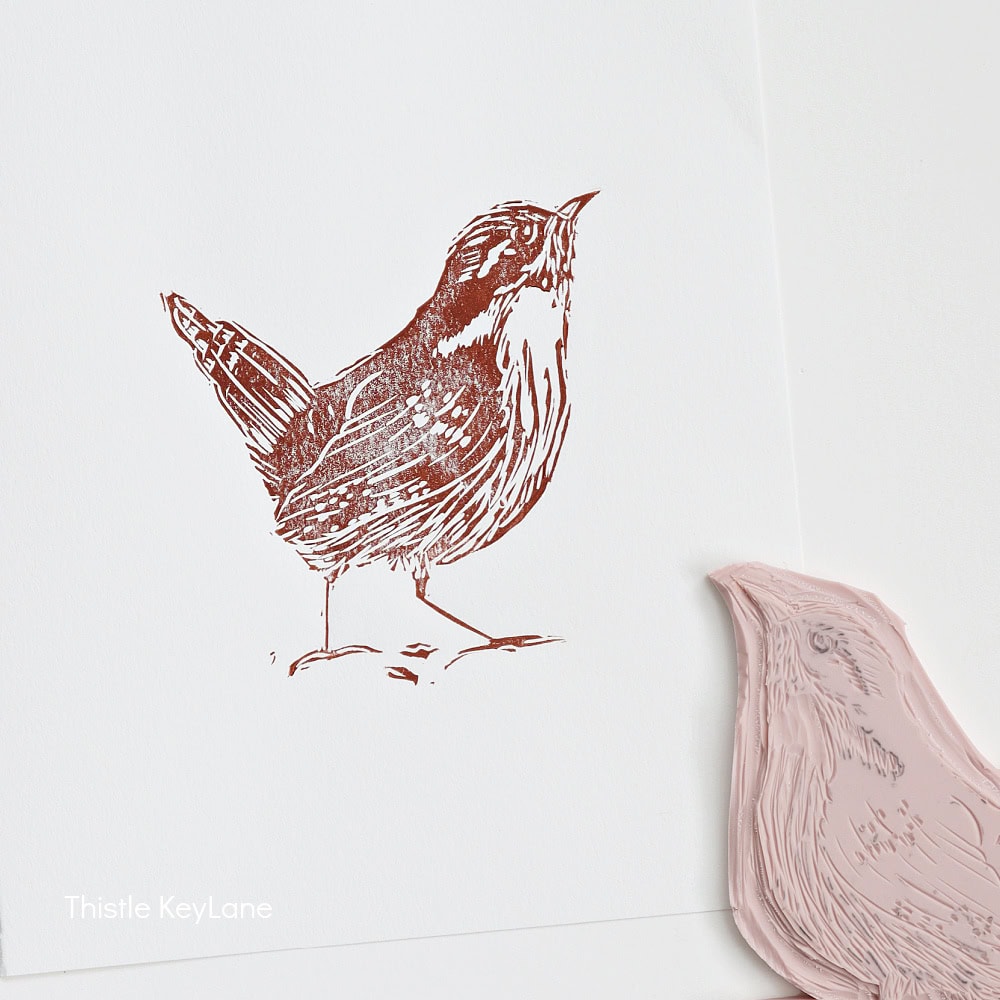
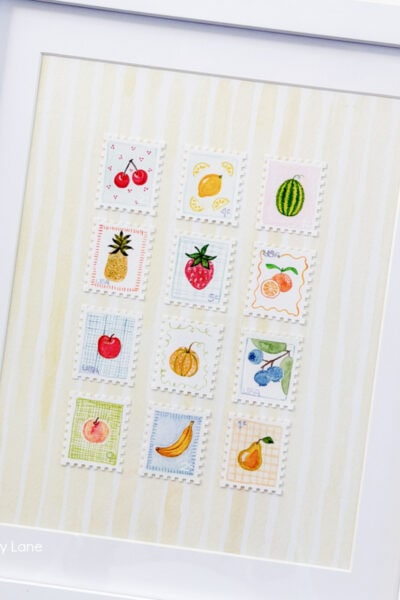
The last print I’m sharing is a little wren using a slightly different technique. Using tracing paper over a watercolor, I’m penciling in just the details I want to carve. Then I’m transferring the pencil marks to the block just as in the example above. Since the image is small, I’m cutting away the extra rubber block creating a stamp. (Be sure to save your scraps for small texts or images you want to print later.)

 Opposite from the block printing above, I’m putting the paper down first, then applying the inked stamp image on top. That way I can center the image on the paper easier.
Block Print Art
I have to say, I’m completely smitten with block printing, and already have more supplies on order. So far, the carving is my favorite part. Although seeing the image after inking is soooooo exciting. It’s like I want to let out a satisfying squeal every time I see the final results!
Eventually, I want to get into multi colors of ink, and work on a series of prints that can be framed together. I’m also looking forward to working with the thinner linoleum blocks to see which medium works best for me. More on that to come!
To see other types of handcrafted artwork you can check out these posts.
- How To Create Art With Pressed Flowers
- Mixed Media Art With Pressed Flowers
- DIY Bobbin Frames In Spring Colors
- Cutting Board Wood Carving DIY
- How To Display Architectural Moulding Pieces
Be sure to follow Thistle Key Lane on Pinterest, where the boards are up to date with seasonal inspiration you can use right now!
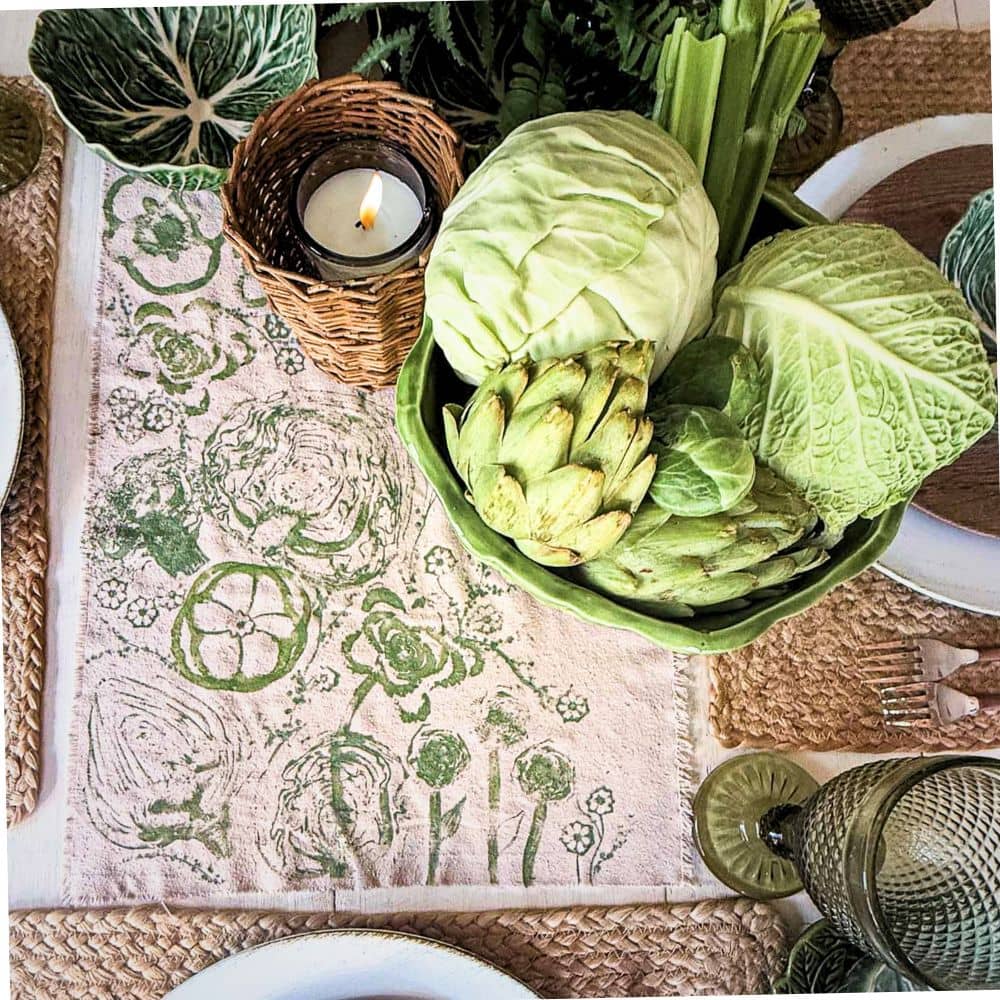
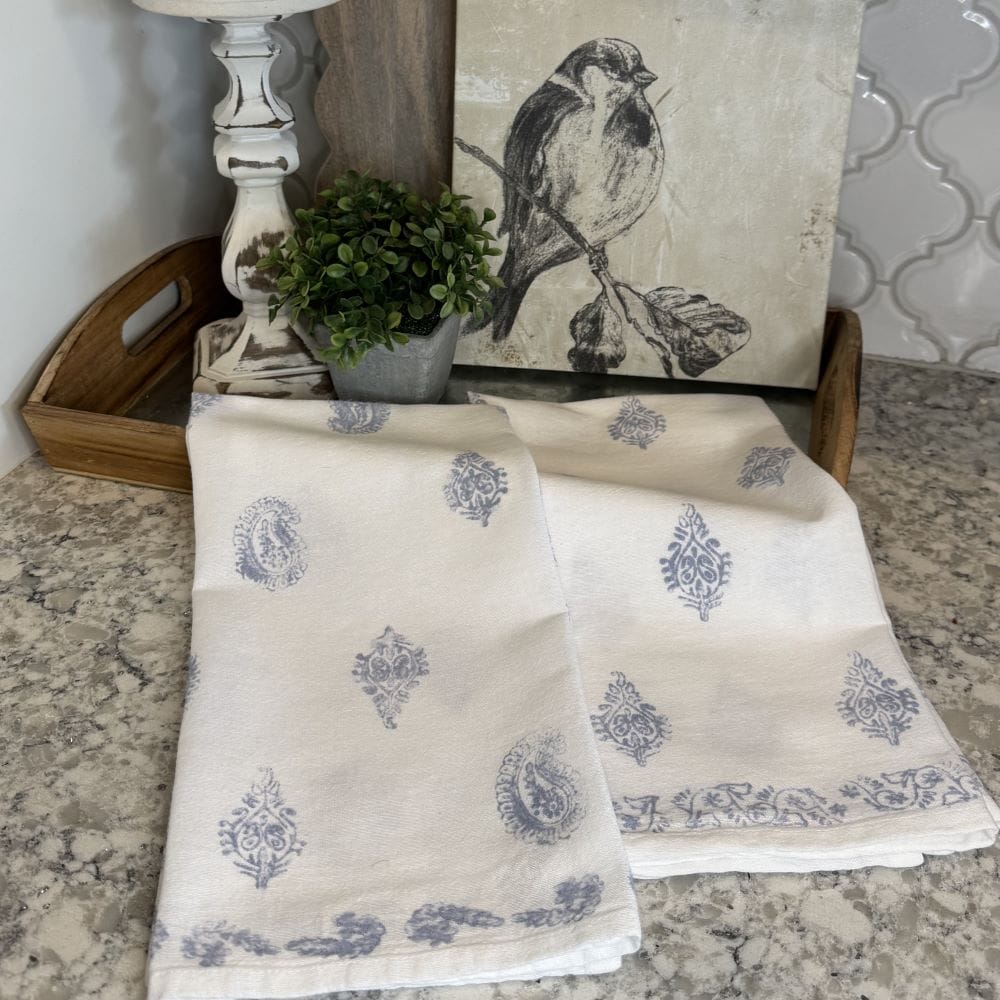
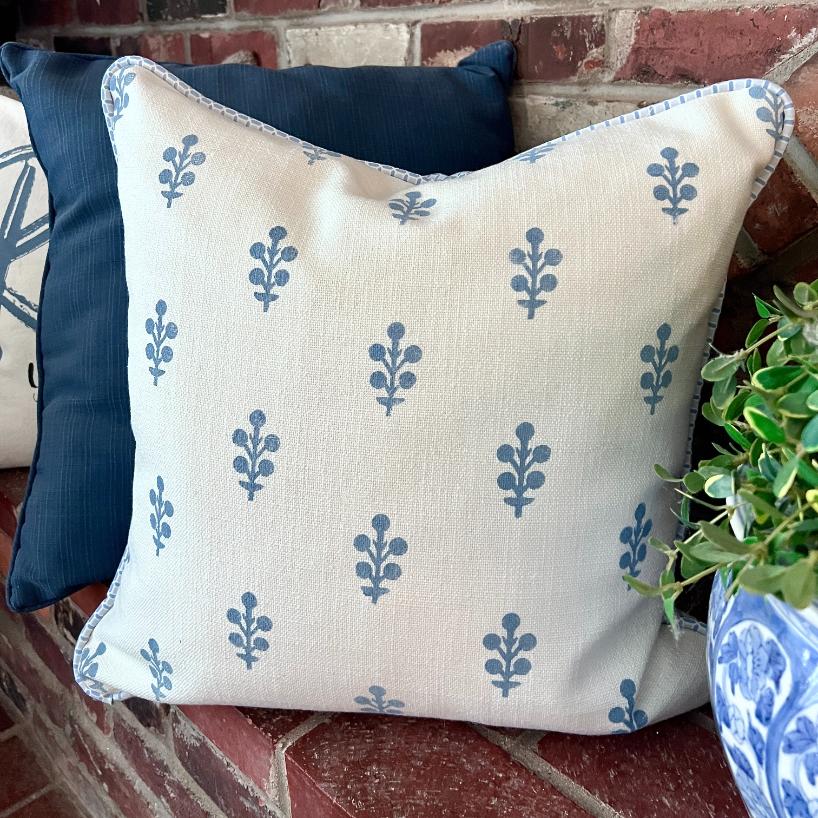
Keep scrolling to see what my Handcrafted Society friends are sharing too. You won’t believe how creative these projects are, and I’m loving the stamping on fabric. So fun!
Block Printing Projects
Thank you so much for visiting today, and reading my beginner’s introduction on how to make block print art. I hope you are inspired!
Cheers!
©2026 Learning How To Make Block Print Art | A Beginners Introduction post first appeared on Thistle Key Lane.

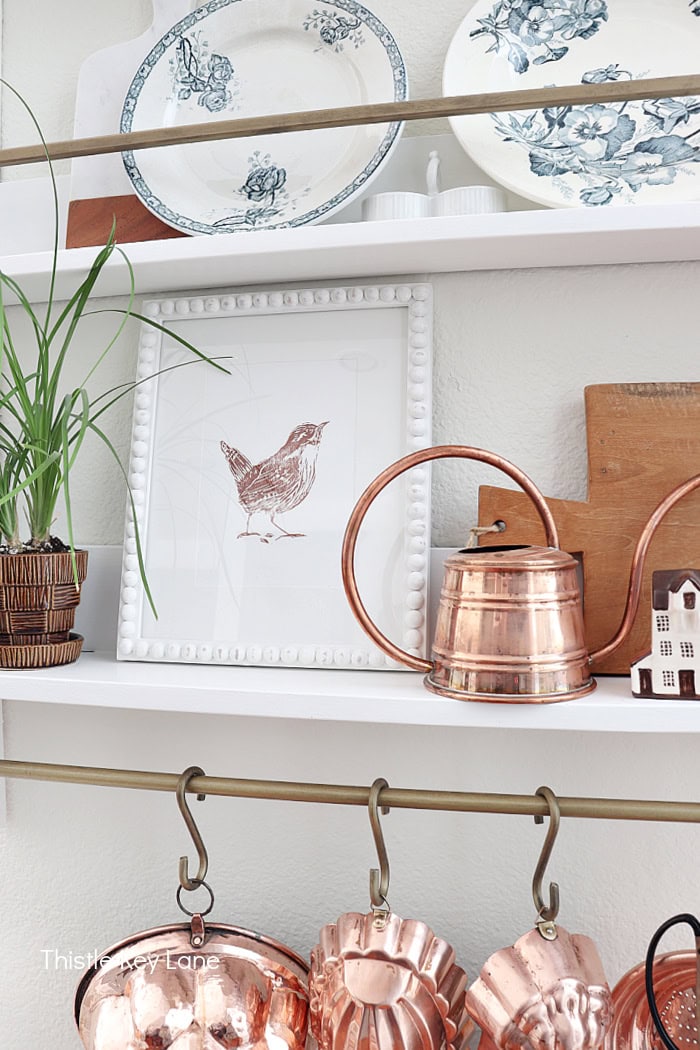
Somehow I knew your artistry would really shine with this challenge!!! I was trying to decide which of your flower prints I liked best, and then the little birdie hopping into the picture. OH MY! he is absolutely fabulous, especially framed and styled as you have him on your kitchen shelf.
You constantly amaze me.
Thank you so much Diane! The flower prints were are good starting point, but I’m much more excited about the little wren. I hope my skills will improve with each project!
Oh Michelle, you’ve inspired me once again. I’ve always wanted to try making one myself, but I’ve been a little afraid to start. I’ve even bought the supplies… and then completely chickened out!
Now I think I’m finally going to give it a try. Your artwork is just stunning and so picture-perfect. Truly beautiful! ✨
With your talents Wendy you will succeed with flying colors! Starting a new craft can be so intimidating. I stared at the box of supplies for about week before saying what the heck, and jumped in! LOL!
This is so impressive, Michelle! I can’t choose a favorite print. You always have such creative projects and inspire me with your skill. And so beautifully styled! BRAVA!
Thanks so much Missy! I love the challenges that come with being in the HS!
It’s been a while since I have carved my own stamps. Thank you for sharing your beautiful inspiration. I love the flower patterns but that sweet bird stole the show. You can make so many beautiful items with him from note cards, gift wrap, etc. You have inspired me to get my tools out again.
Thanks so much Tammy! I need to find more time to create a few more pieces!
Michelle! I am so impressed that you carved the stamps yourself! Every one of your block prints is gorgeous! You need to open a store and sell these! Thanks for sharing the tutorial, I’m inspired to try this sometime! Pinning it now!
Thank you so much Donna! I ordered some more carving tools, and can’t wait to see what I can create next!