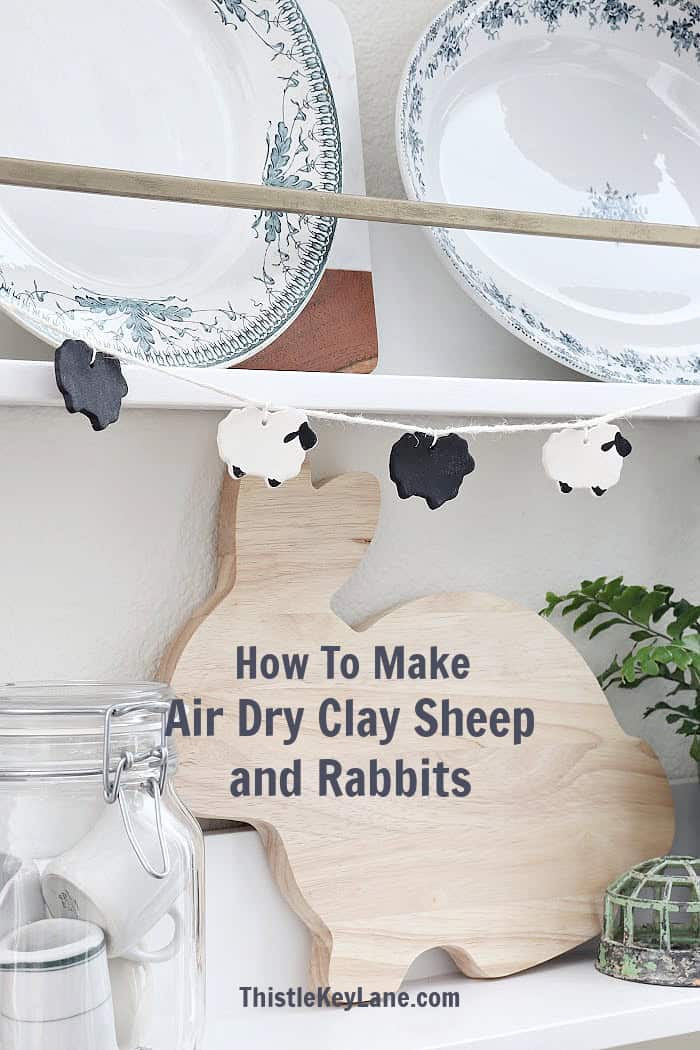
DIY Air Dry Clay Sheep And Rabbits. See how to create air dry clay sheep and rabbits for spring decorating. Use these adorable clay cutouts for garlands and ornaments. You can also make wire hangers for displaying in potted plants or flower arrangements.
As an Amazon affiliate, I earn from qualifying purchases at no cost to you. My blog may contain affiliate links for your convenience. For more information please see my disclosure page.
DIY Air Dry Clay Sheep And Rabbits
If you’re looking for a fun project to chase away any lingering winter blues or just enjoy easy crafts, this one is for you. I love decorating with simple additions like these sheep and rabbits for just a hint of seasonal change. You can make these cutouts in no time at all, but you’ll have to be patient to allow them to dry.
Supplies with Shopping links
- white air dry clay
- assortment of clay tools
- glass bottle or acrylic roller
- mini sheep or rabbit cookie cutter 1.5″
- sponge and water bowl
- white embroidery thread (twisted skein)
- white twine
- ribbon
- scissors
- plastic bag with zip closure
- clear mat sealer
How To Make Clay sheep and rabbits
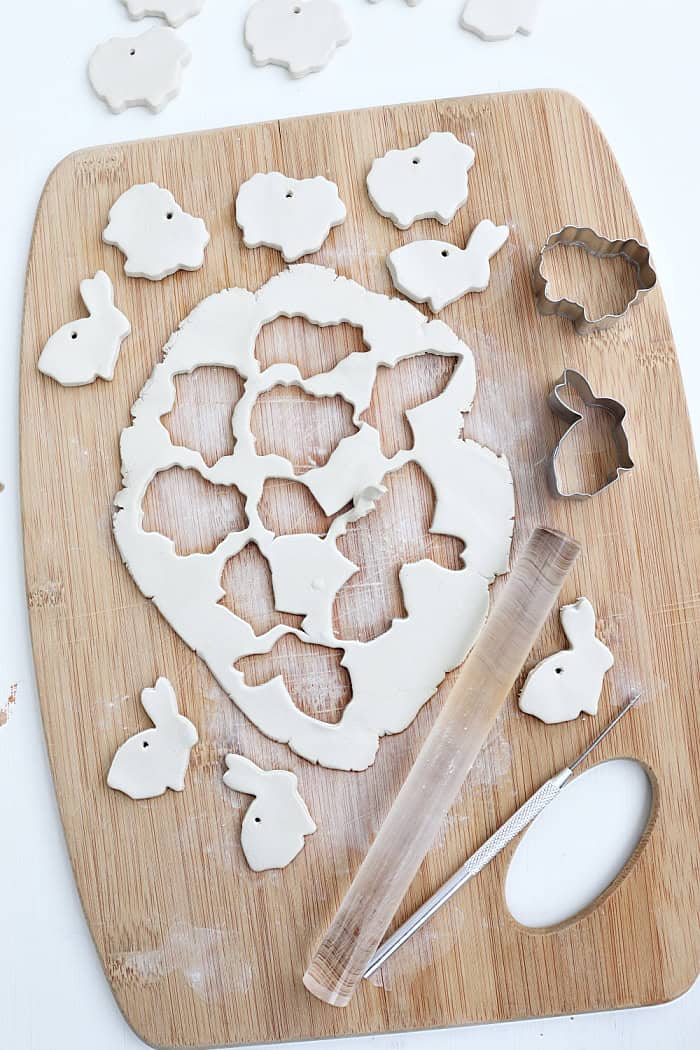
- Scoop out a hand size amount of clay and work into a ball. (By the way be sure to keep your clay in an air tight plastic bag to keep it soft and moist.)
- Place clay on your board or work surface, and roll out the clay with an acrylic rolling pin or a smooth glass bottle to your desired thickness.
- Use a cookie cutter to cut out your sheep or rabbit shape, then create a hole for hanging. You can use a plastic cocktail straw to make a small hole or the tip of a clay tool.
- Carefully lift the sheep and rabbits off your board and clean up the edges if you need to do so. Take the leftovers and repeat the process until you have the amount of cutouts that you want.
- Keep a wet sponge in a bowl next to your work area, so you can dampen your fingers with water to smooth out the clay or fix imperfections.
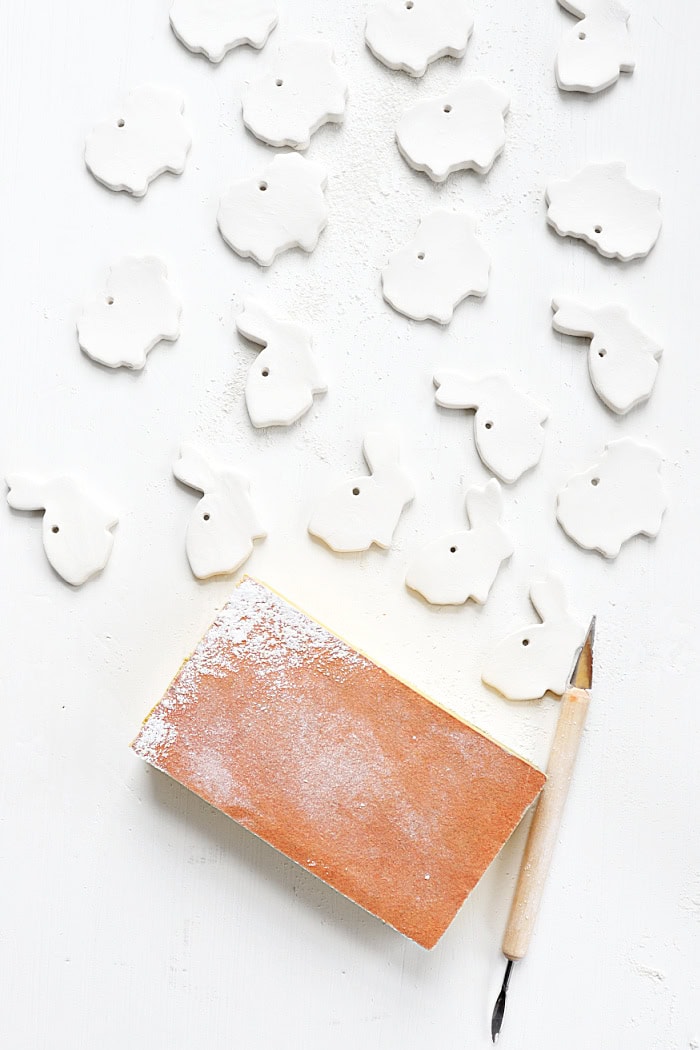
- When drying, be sure to turn the cutouts over every few hour or so to help the clay dry as evenly as possible. When the clay pieces are dry enough to handle use fine sandpaper or a sanding sponge to delicately remove rough edges. Let the cutouts dry 24 hours before painting. Use a clear mat sealer to help preserve your cutouts.
- To create a garland cut about six inches of the embroidery thread for each sheep, then tie and knot each sheep to a long piece of string or twine. Trim off extra thread with scissors.
- To make rabbit ornaments, thread narrow ribbon through the hole and knot the ends.
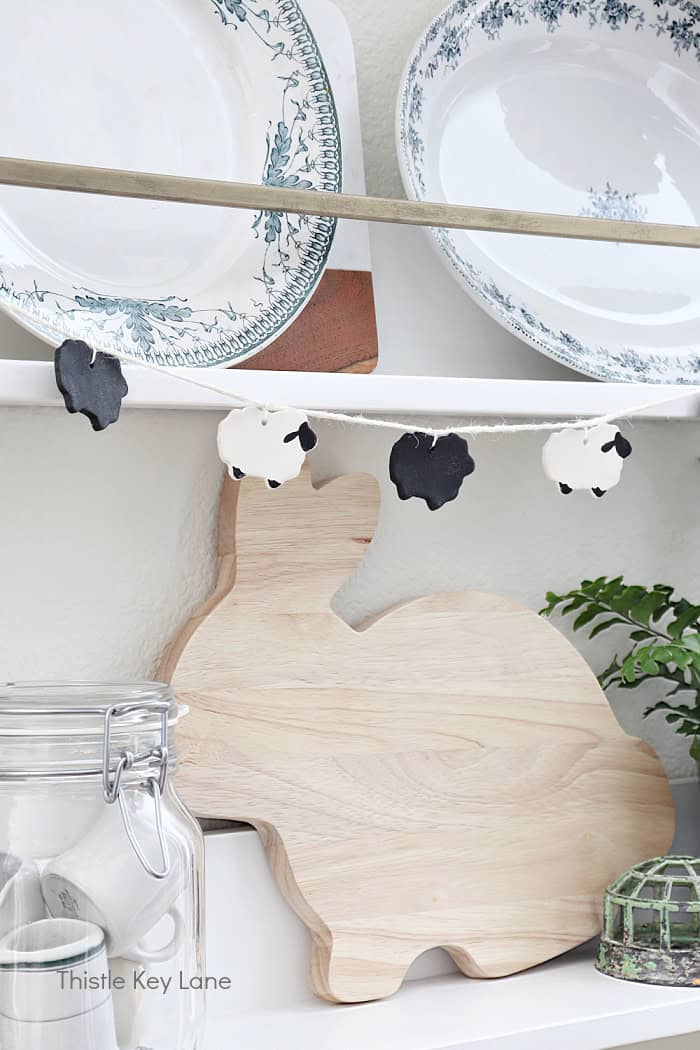
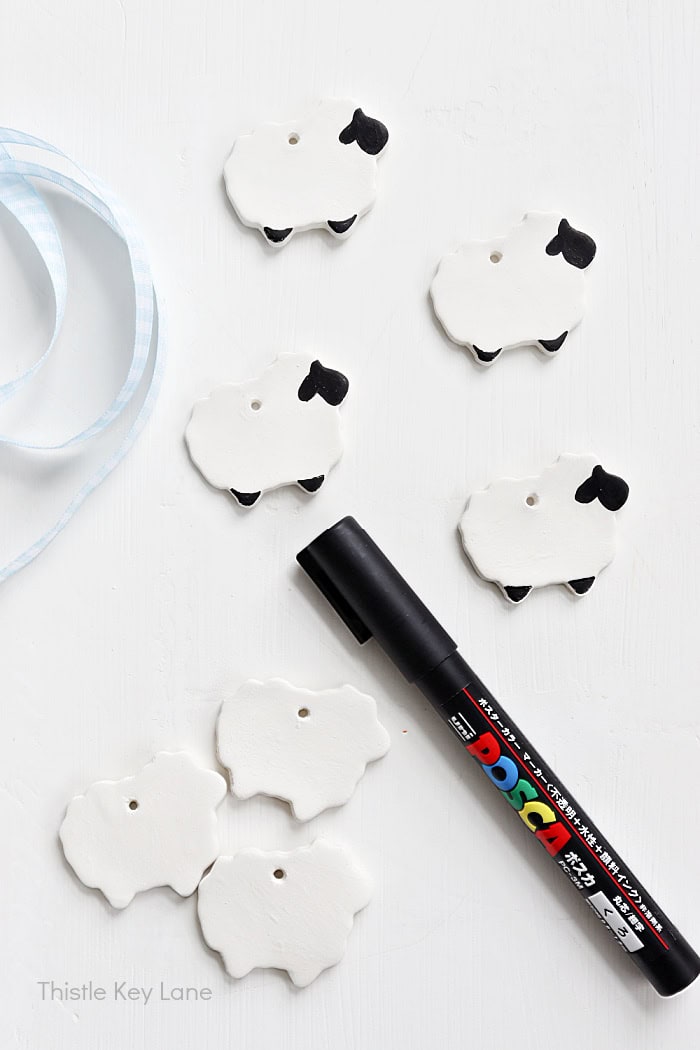
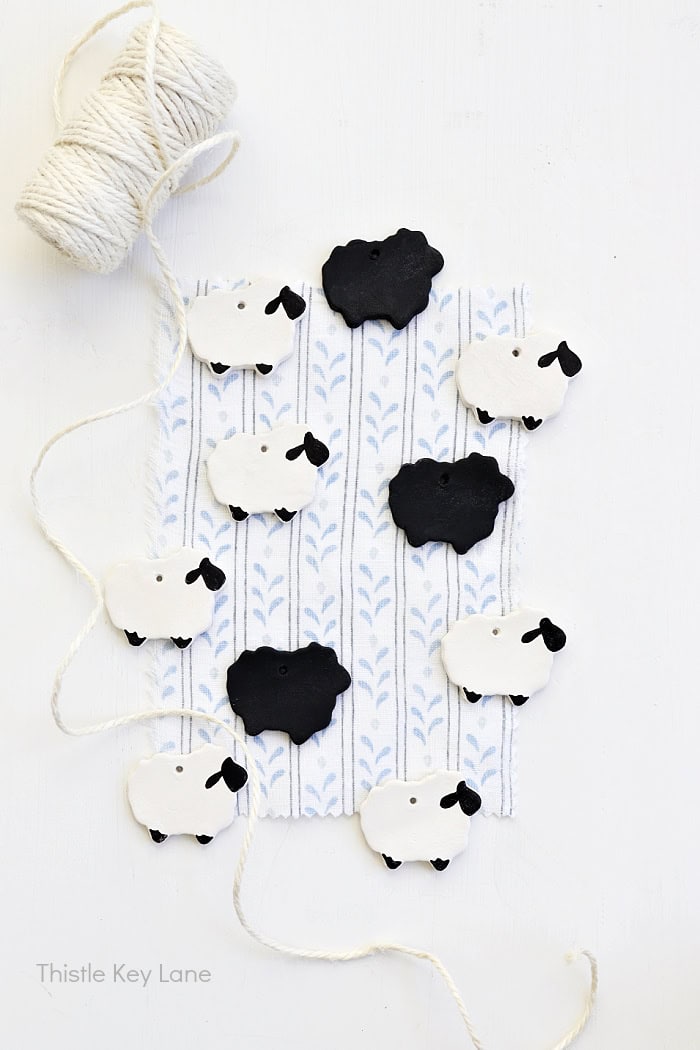
Black Faced Sheep
I have a soft spot in my heart for sheep especially black faced sheep. For some reason they’re my absolute favorite. To make black faced sheep, I’m using a paint marker to create the face, ear and legs. You can find this paint marker here. The ones that didn’t turn out so well, I applied a coat of black textured craft paint to both sides. No one will know except you and me, but don’t they look cute in the mix?
The plate rack in the kitchen is the ideal place for a garland with a little nod to spring. You can create the same look with the rabbits or have a sheep and rabbit garland. Why not?!

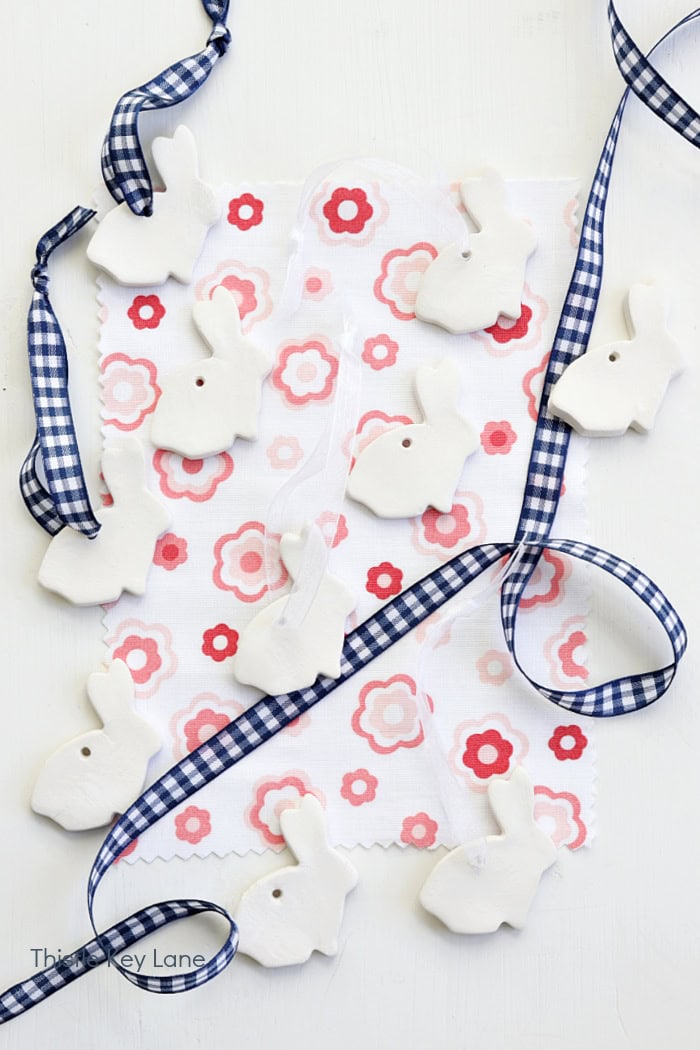
White Bunny Rabbits
So I have a confession to make on the white bunny rabbits. When making the holes I should have made them further to the right for better balance or in the center of the ears. It may not bother some people, but I think they will look better if they are hanging straight. So keep that in mind when making your rabbits.
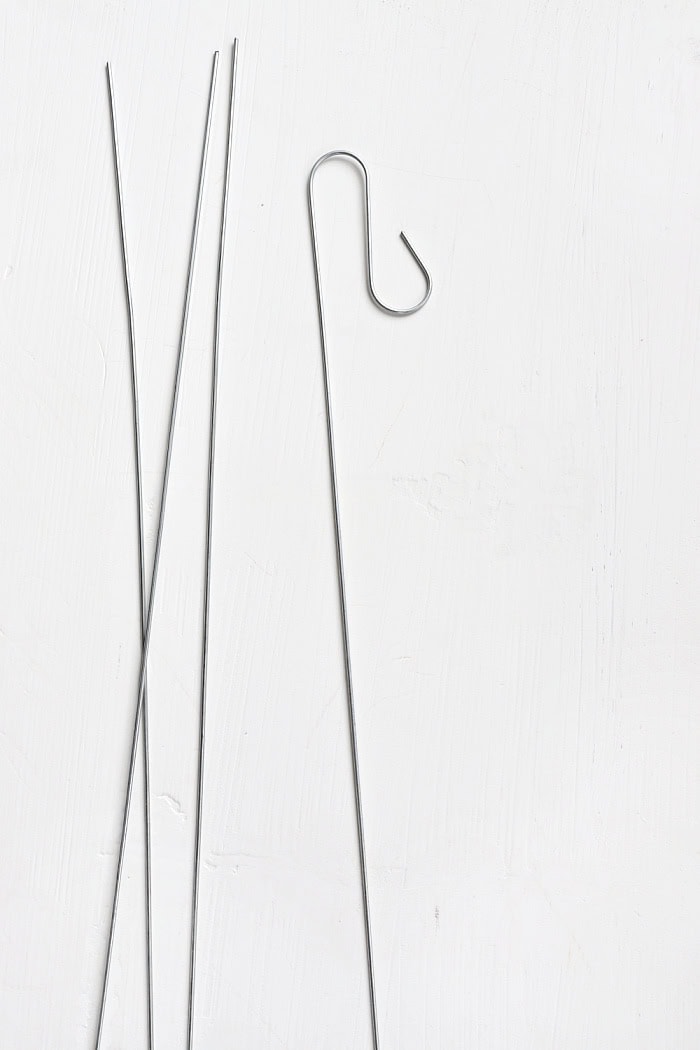
I’m planning on making a tree for displaying the rabbits. I just haven’t ventured out to forage for a good branch yet due to the lousy cold weather, so more on that to come. For now I’m experimenting with a wire hook to display a rabbit in a potted plant or flower arrangement.
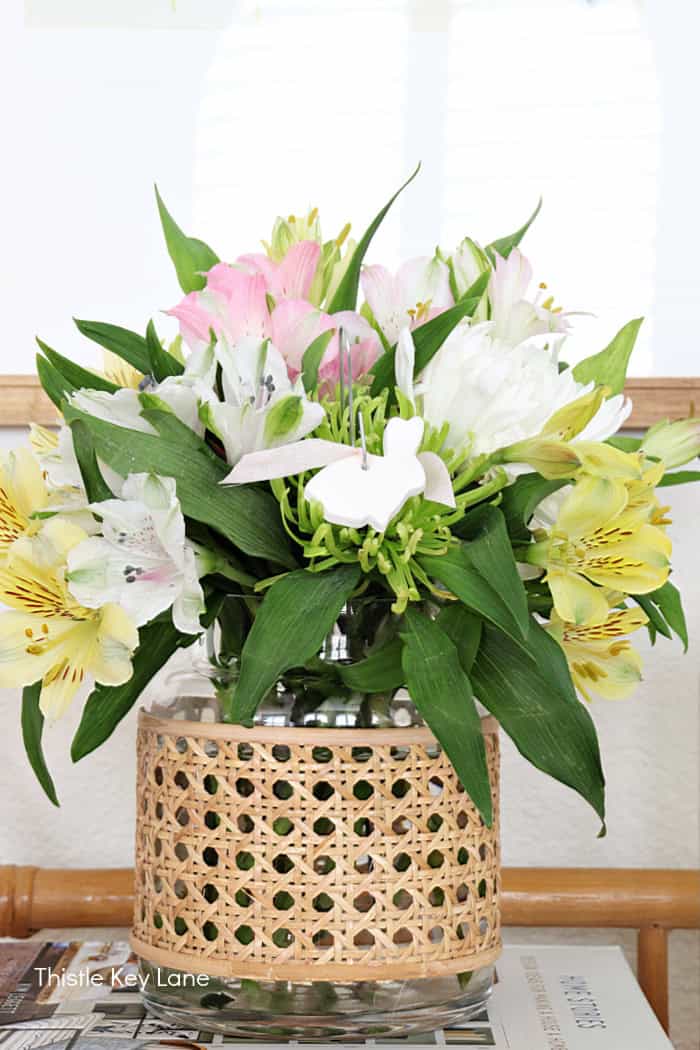
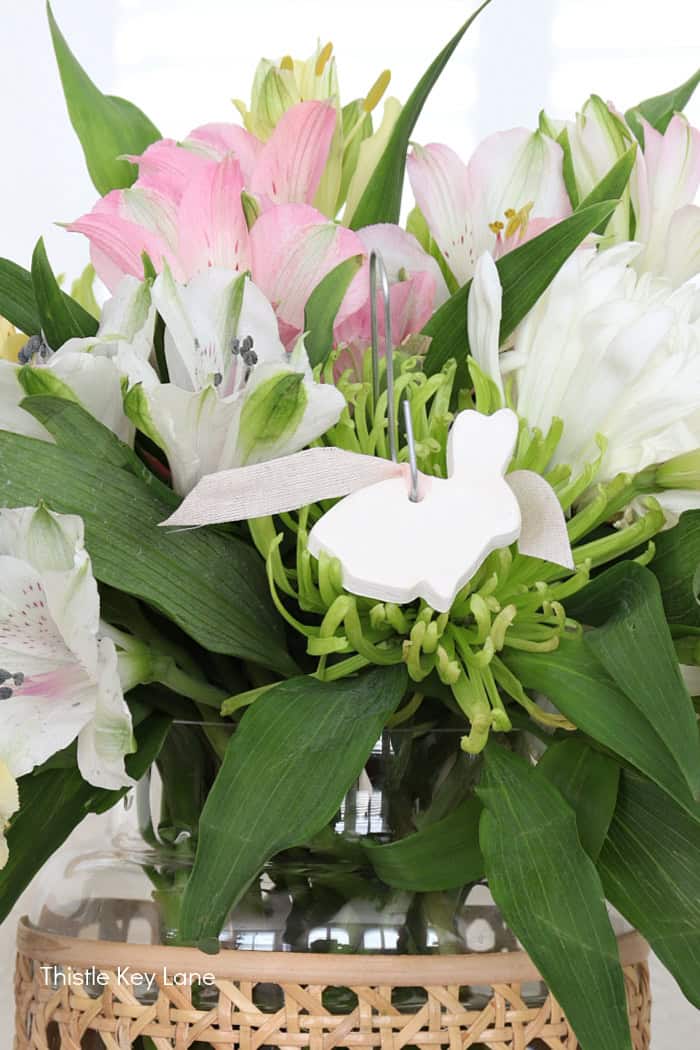
Using a straight 18 gauge florist wire create a smooth curve by bending the wire around a marker or pen. Insert the wire into the arrangement, then add the rabbit. Imagine how cute these will be in springtime shades for a pop of color.
Be sure to follow Thistle Key Lane on Pinterest, where the boards are up to date with seasonal inspiration you can use right now!
Before you go I have a few more air dry clay projects you can take a look at. Click here for bird trinket dishes and here for terra cotta clay carrots.
Thanks for popping in for a visit today, and I hope you will enjoy making air dry clay sheep and rabbits. Spring will be here before we know it!
Cheers!
©2025 DIY Air Dry Clay Sheep And Rabbits post first appeared on Thistle Key Lane.

Leave a Reply