How did I not know that DIY moss covered letters were so easy to make? I’m a super crafty person, so I should know this. It’s like showing up for late for a party, and realizing I only have mascara on one eye. Now, I want to make moss letters for every season and holiday I can think of. You can make them too, with a few simple steps.
DIY Moss Covered Letters
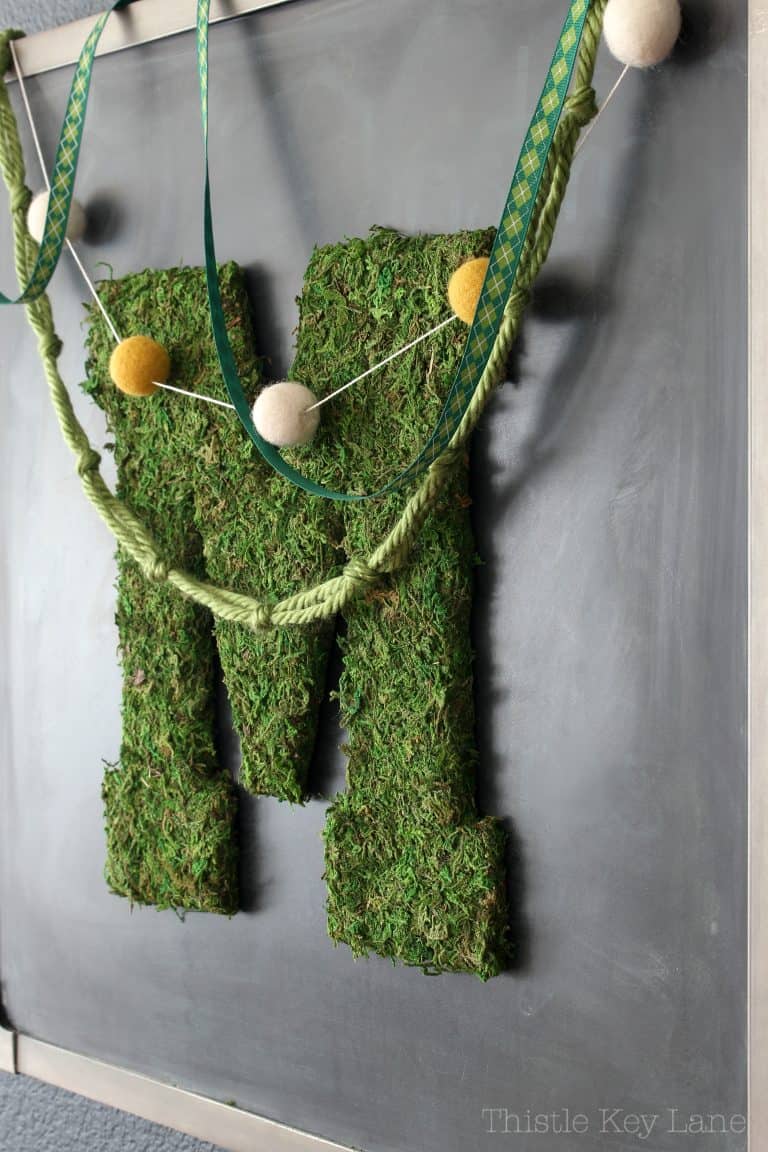
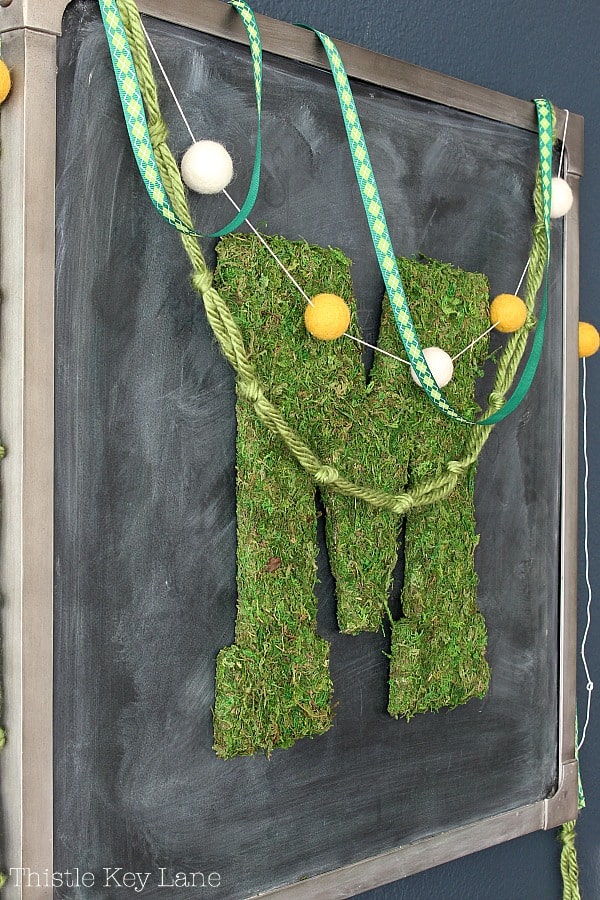
Right now decorating for spring is on my mind and I love how the pop of green looks on the chalkboard. To me the chalkboard is like a blank canvas and a good spot for adding seasonal decor.
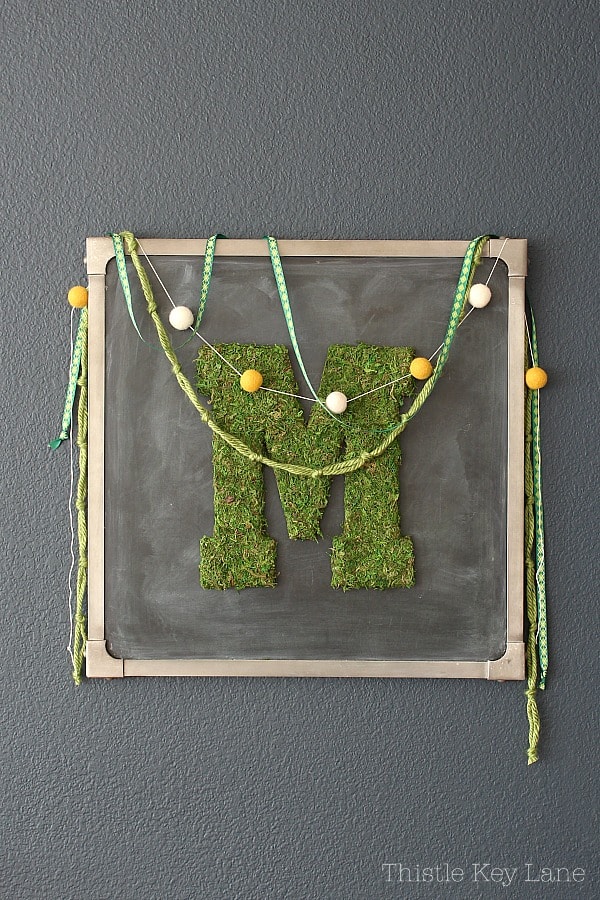
Since March is around the corner I added a festive touch of garlands to go with the spring inspired letter M. The argyle green ribbon reminds me of spring, as well as St. Paddy’s Day. I gotta have my green, after all I am a wee bit Irish.
Supplies
- Wood, MDF or Paper-mache Letter
- Sheet Moss
- Scissors
- Hot Glue Gun
- Glue Sticks
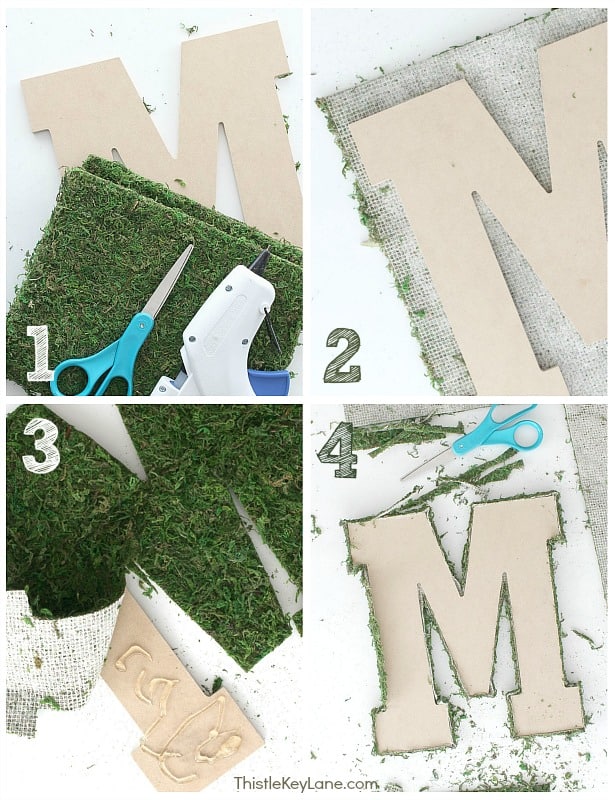
Sheet moss has a thin web backing that’s easy to cut with scissors. My first step was cutting out a section large enough to cover the letter. Then I trimmed around the letter leaving enough moss to cover the sides.
Next I applied hot glue in sections and pressed the sheet moss into place. With the moss in place on the front flat surface, I started gluing moss around the edge.
The last step was trimming the sheet moss so that only the front and edges were cover.
Note: Both sides can be covered with the moss, however I wanted to hang my letter on my chalkboard and I wanted a smooth flat surface on the back.
My secret to attaching the moss letter to the chalkboard is using Command Picture & Frame Hanging Strips.
Uses For DIY Moss Covered Letters
- Door monogram
- Spring decor
- Garden party theme
- Bride and groom chairs
- Spell out love for Valentine’s Day
- Out door party
- Baby Shower
I bet you can think of dozens of ways to use moss covered letters too.
Be sure to follow Thistle Key Lane on Pinterest. The boards are updated daily with seasonal inspiration that you can use right now!

Thank you for stopping by. More decorating with green inspiration is coming!
Cheers!
©2019 DIY Moss Covered Letters post first appeared on Thistle Key Lane.


Great project Michelle! I never realized sheet moss could even be purchased! Were in the world have I been all these years!
That’s how I felt too Cindy! 🙂 Thanks so much for stopping by!
Love this idea. Pinned to my baby shower planning board.
Thank you Dorothy, planning a baby shower is so much fun!
What a cool idea Michelle! Love it
Thank you Denise, have a great week!
Love this… so pretty and lovely for spring decor! Be sure to link it up on Homestyle Gathering! 😉 pInned!
Thanks Julie, I’m there!
Yay! Thanks for linking up! We love having you!
Thank you Julie!
Such a charming and well presented project, Michelle! You have such an artist’s touch in all that you do. Pinned!
Thanks Crissy, I’m hooked on how easy these letters are to make and want to make more. 🙂
Great project idea! I’m getting excited for spring!
Thanks for sharing
>> Christene
Keys to Inspiration
Thanks Christene, spring is a fun time for decorating and we’re just getting started.
Love this idea! It’s so easy and fast to make, yet it looks so gorgeous and brings in the spring vibe the best possible way. I’m thinking of making more than just one letter, so I can create fun and interesting words that welcome spring into my home. Thanks for sharing!
Katarina,I know you’ll have fun making moss letters. Thank you so much for stopping by!
So fun! I can’t wait to give this a try! 🙂
Super easy project Barbara. Have fun with it!
The moss looks so good on your “M” initial! I wish it would look as good on an “L.” Pinned!
I know what you mean LOL. Maybe you can find an “L” with pretty loops.
What a clever idea to use sheet moss to make a giant letter! I love how you displayed the letter too – so pretty!
Thank you Jayne!
Such a cute craft…especially for spring! It’s so versatile! Thanks for sharing this today!
Thank you so much for stopping by and commenting! Big hugs!