


Today’s project, how to create a paint and liming wax finish, is on a small-scale. This is an old oak school chair I picked up a few years ago in an antique store while shopping with my daughter on Amelia Island. I bought the chair thinking I would get it home somehow, but as it turned out my daughter kept it. Funny how those things happen, and it’s a good thing, because now it belongs to the grand baby.


Furniture projects come in all sizes, so why not create the same finishes for kids furniture too. For now the child’s chair will be good practice, but just think how fabulous the same finish will look on a chest-of-drawers.
As with so many vintage pieces, the wood was really dried out and scarred with nicks and gouges. I though it was time for a good coat of paint and an application of liming wax to fill in the open grain of the wood. After all a smooth surface will be better for those sweet little hands.


This post contains affiliate links for your shopping convenience. Please see the disclaimer for details.
I’m still so excited to be working with A Makers’ Studio Rescue Restore paints and supplies. The water based paints have no VOCs and are safe to use on children’s furniture.
Note: In this post when I talk about liming wax, I’m referring to the Cerusing Wax product and have provided a link below for your convenience.
Paint And Liming Wax Finish Supplies
- Furniture and Cabinet Cleaner
- Sandpaper
- Rescue Restore Paint Summer Nights
- Cerusing Wax (liming wax)
- Paint brush
- Light Antiquing Wax
- Cotton cloth
Cleaning up the chair involved some spot sanding and a through cleaning.


I highly recommend using Furniture & Cabinet Cleaner to remove dirt, grime and oils. This is a great product that I have used on many projects before applying paint.
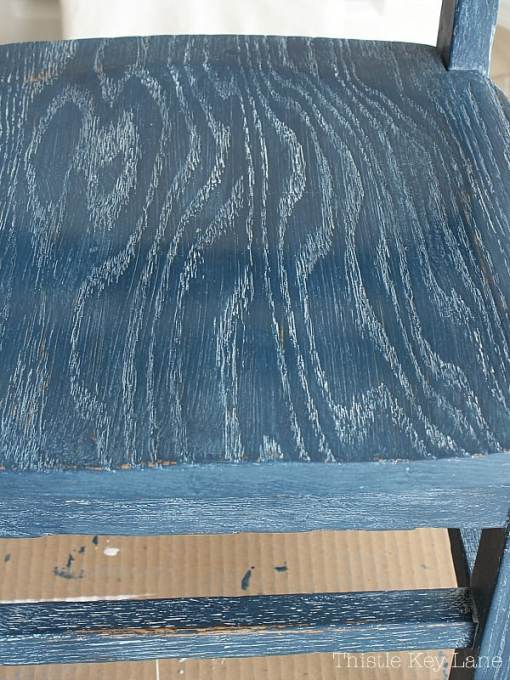
After the chair was cleaned, I painted it with this beautiful blue paint color called Summer Nights.

Once the paint was dry, I liberally brushed on the liming wax working it into the grain of the wood and then removed the excess wax with a clean cotton cloth.

I suggest working with the liming wax in small sections because the longer the wax sits, the harder it is to remove the excess amount. See how the wax highlights the wonderful character of the oak? That’s exactly what I envisioned.
The last step was applying a light antiquing wax to the whole chair using a soft cotton cloth to polish the finish to a warm luster.
Who knew this little chair could have so much character with a paint and liming wax finish. Just look at the highlighted wood grain.
Be sure to follow Thistle Key Lane on Pinterest. The boards are up to date with seasonal inspiration that you can use right now!


Thanks so much for stopping by to see my small scale furniture project. For more ideas, see the post How To Update Furniture With Liming Wax.
Cheers!
©2019 How To Create A Paint And Liming Wax Finish post first appeared on Thistle Key Lane™